Flat Lay Photography: How to Style Like a Pro in 2024
Flat lay photography has become the visual language of social media, e-commerce, and digital marketing. From Instagram feeds to product listings, these perfectly arranged overhead shots capture attention and tell stories through carefully curated objects. Whether you're a beauty blogger showcasing your skincare routine, a food stylist presenting culinary creations, or a business owner marketing products, mastering flat lay photography is essential for creating scroll-stopping content.
The beauty of flat lay photography lies in its accessibility. You don't need expensive studio equipment or years of photography training to create stunning images. With the right techniques for lighting, composition, and styling, anyone can produce professional-quality flat lays using equipment they likely already own.
In this comprehensive 3,000-word tutorial, we'll walk you through everything you need to know about flat lay photography—from basic setup and essential equipment to advanced styling techniques and post-processing secrets used by professional photographers. By the end, you'll have the skills to create cohesive, visually appealing flat lays that elevate your brand and captivate your audience.
Table of Contents
- What Is Flat Lay Photography?
- Essential Equipment for Flat Lay Photography
- Setting Up Your Flat Lay Space
- Mastering Flat Lay Lighting
- Composition Techniques That Work
- Styling by Niche: Beauty, Food, Fashion & More
- Color Theory and Palette Selection
- Props and Backgrounds: Building Your Collection
- Post-Processing for Professional Results
- Common Flat Lay Mistakes to Avoid
- FAQ
What Is Flat Lay Photography?
Flat lay photography is a style of photography where objects are arranged on a flat surface and photographed from directly above (overhead or bird's-eye view). This perspective eliminates depth and creates a two-dimensional, graphic quality that highlights shapes, colors, and arrangements.
Characteristics of Great Flat Lays
Top-Down Perspective: The camera is positioned at 90 degrees to the surface, creating a true overhead view. Any angle other than directly above technically becomes a different style of photography.
Intentional Arrangement: Unlike random snapshots, flat lays feature carefully placed objects with deliberate spacing, alignment, and visual relationships between elements.
Visual Storytelling: Every object serves a purpose—whether it's setting a mood, demonstrating a process, or showcasing products in context.
Clean Aesthetics: Professional flat lays typically feature uncluttered arrangements with breathing room around objects and cohesive visual themes.
Popular Flat Lay Applications
- Social Media Content: Instagram, Pinterest, and blog imagery
- Product Photography: E-commerce listings and marketing materials
- Editorial Features: Magazines and online publications
- Brand Photography: Consistent visual identity across platforms
- Personal Projects: Scrapbooking, journaling, and memory keeping
Essential Equipment for Flat Lay Photography
You don't need professional gear to create stunning flat lay photography, but having the right equipment makes the process easier and the results more consistent.
Camera Options
Smartphone Cameras:
Modern smartphones capture excellent flat lay images. The iPhone 15 Pro, Samsung Galaxy S24 Ultra, and Google Pixel 8 Pro all produce professional-quality results in good lighting.
Key smartphone advantages:
- Always with you for spontaneous setups
- Excellent computational photography features
- Instant editing and sharing capabilities
- Grid overlay for precise composition
iPhone 15 Pro on Amazon → — Affiliate link
DSLR/Mirrorless Cameras:
For maximum control and image quality, dedicated cameras offer:
- Larger sensors for better low-light performance
- Manual exposure control
- RAW capture for extensive editing flexibility
- Interchangeable lenses for different effects
Recommended entry-level options:
- Canon EOS R50
- Sony ZV-E10
- Nikon Z30
- Fujifilm X-S20
Canon EOS R50 → — Affiliate link
Lenses for Flat Lays
Standard Zoom (24-70mm equivalent): Most versatile for general flat lay work
Macro Lens: Essential for detail shots and small product photography
50mm Prime: Affordable, sharp, and excellent for lifestyle flat lays
Essential Accessories
Tripod: A sturdy tripod with an overhead arm or horizontal column mount is crucial for stable, consistent overhead shots.
Recommended options:
- Manfrotto 055 with horizontal column
- Vanguard Alta Pro 263AB
- Neewer Overhead Camera Mount
- Selens Overhead Tripod Mount
Neewer Overhead Mount → — Affiliate link
Lighting: Natural light is free and beautiful, but artificial lighting provides consistency.
Options include:
- Softbox lighting kits
- LED panel lights
- Ring lights (for smaller setups)
- Reflector boards for bouncing natural light
Neewer Softbox Lighting Kit → — Affiliate link
Remote Shutter: Avoid camera shake with a wireless remote or smartphone app trigger.
Setting Up Your Flat Lay Space
Creating a dedicated flat lay photography space streamlines your workflow and improves consistency.
Choosing Your Surface
Size Matters: Your surface should accommodate your largest typical arrangement plus room for lights and your shooting position. Minimum recommendations:
- Small products: 2x3 feet
- Medium arrangements: 3x4 feet
- Large spreads: 4x6 feet or larger
Surface Options:
Tabletop: Standard tables work but may show wear. Cover with:
- V-flats (foam boards hinged together)
- Seamless paper rolls
- Vinyl backdrops
- Fabric throws
Floor Setup: For very large arrangements, the floor provides unlimited space. Use painter's tape to secure backdrops and protect from foot traffic.
Dedicated Flat Lay Table: Purpose-built photography tables with adjustable height and overhead mounting systems. Ideal for frequent shooters.
Savage Seamless Paper Backdrop → — Affiliate link
Creating Your Shooting Station
Step 1: Position Your Surface
Place your shooting surface near a large window for natural light, or in a space where you can control artificial lighting completely.
Step 2: Set Up Your Camera
Mount your camera directly above the center of your shooting area. The lens should be parallel to the surface—use a level if necessary.
Step 3: Arrange Lighting
Position lights at 45-degree angles to minimize shadows and create even illumination. For natural light, use diffusing curtains or shoot on overcast days.
Step 4: Organize Props Nearby
Keep frequently used props within arm's reach to maintain flow during styling sessions.
Maintaining Your Space
- Store backdrops rolled or flat to prevent creases
- Keep props organized in clear containers
- Clean surfaces before each shoot
- Have cleaning supplies nearby for quick touch-ups
Mastering Flat Lay Lighting
Lighting can make or break your flat lay photography. Here's how to achieve professional results.
Natural Light Techniques
The Window Light Setup:
Position your flat lay surface perpendicular to a large window. This creates soft, directional light with gentle shadows that add dimension.
Best Times to Shoot:
- Overcast days: Soft, even light with minimal shadows
- Morning/late afternoon: Warm, directional light (golden hour)
- Midday (with diffusion): Bright but harsh—use sheer curtains or diffusion panels
Managing Harsh Light:
- Hang sheer white curtains to diffuse direct sun
- Use white foam boards as reflectors to fill shadows
- Create a "tent" with diffusion material above the setup
Neewer 5-in-1 Reflector → — Affiliate link
Artificial Lighting Setup
Two-Light Setup (Recommended for Beginners):
Position two identical lights at 45-degree angles on either side of your flat lay, slightly above the surface. This creates even illumination with minimal shadows.
Three-Point Lighting (Advanced):
- Key Light: Main illumination source at 45 degrees
- Fill Light: Softer light opposite the key to reduce contrast
- Back Light: Optional separation light for dimensional objects
Light Quality:
- Softboxes: Create soft, flattering light ideal for most flat lays
- Umbrellas: More affordable, slightly harder light
- LED Panels: Adjustable color temperature, consistent output
- Ring Lights: Best for very small arrangements and product details
Emart Softbox Lighting Kit → — Affiliate link
Lighting Tips for Different Looks
Bright and Airy: Overexpose slightly, use white backgrounds, add fill light to minimize shadows
Moody and Dramatic: Underexpose, use dark backgrounds, emphasize shadows, shoot with directional light
Clean and Commercial: Even lighting, minimal shadows, neutral backgrounds, consistent color temperature
Warm and Lifestyle: Golden hour natural light or tungsten-balanced artificial light, textured backgrounds, visible shadows for depth
Composition Techniques That Work
Strong composition separates amateur snapshots from professional flat lay photography.
The Rule of Thirds
Divide your frame into a 3x3 grid. Place key elements along these lines or at intersection points for balanced, engaging compositions.
Most camera apps and smartphones offer grid overlays—enable them for precise alignment.
Creating Visual Flow
Z-Pattern: Arrange elements to guide the eye in a Z-shaped path across the image
Spiral: Place the main subject centrally, with supporting elements spiraling outward
Diagonal Lines: Create dynamic tension by arranging elements along diagonal paths
Circular Flow: Guide viewers around the frame with curved arrangements
Spacing and Balance
Negative Space: Don't fill every inch. Breathing room around objects creates sophistication and draws attention to key elements.
Visual Weight: Larger, darker, or more complex objects carry more visual weight. Balance them with multiple smaller elements or strategically placed negative space.
Odd Numbers: Groups of 3, 5, or 7 objects typically appear more natural and appealing than even-numbered groupings.
Layering for Depth
While flat lays are inherently two-dimensional, layering creates subtle depth:
- Place some elements partially overlapping others
- Use fabrics with folds and creases
- Include objects with varying heights
- Create shadows that extend across the surface
Grid Layouts
For product showcases and collections:
- Arrange items in neat rows and columns
- Maintain consistent spacing between objects
- Align edges for a polished, catalog-style appearance
- Vary one element (color, size) to add interest within uniformity
Styling by Niche: Beauty, Food, Fashion & More
Different subjects require different approaches to flat lay photography. Here's how to style various niches.
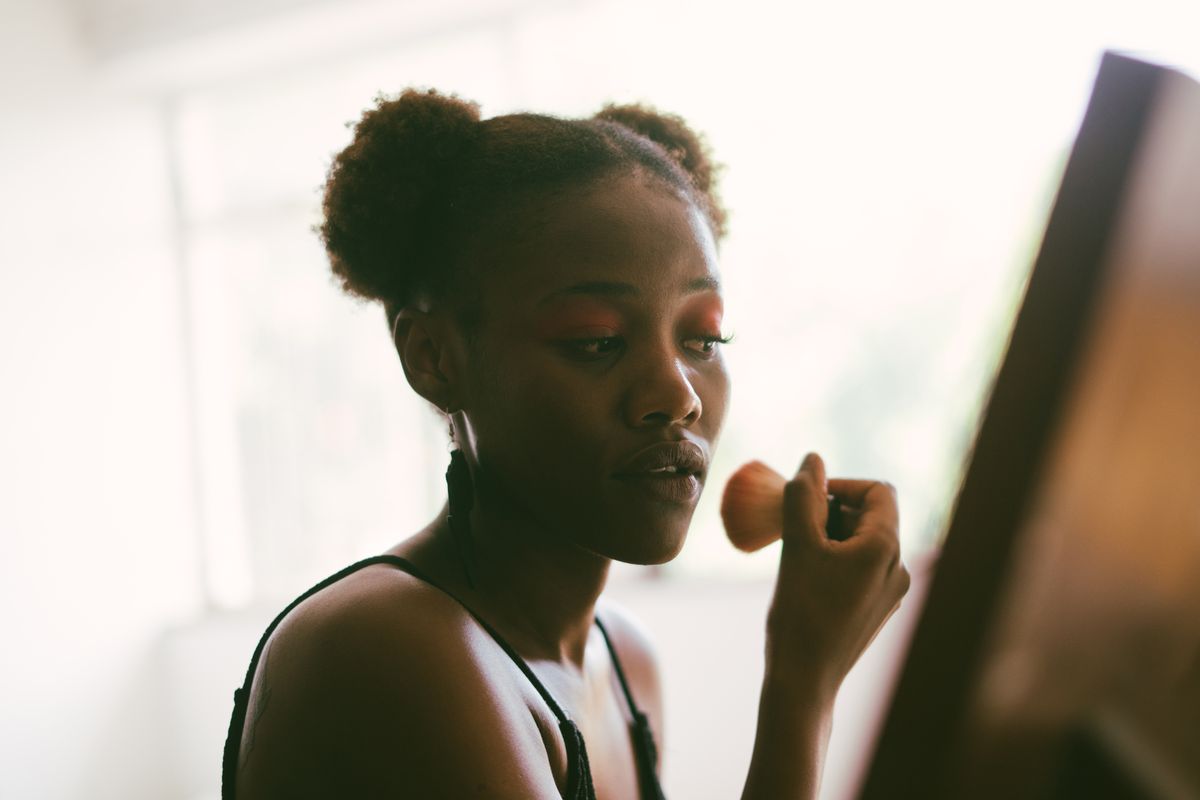
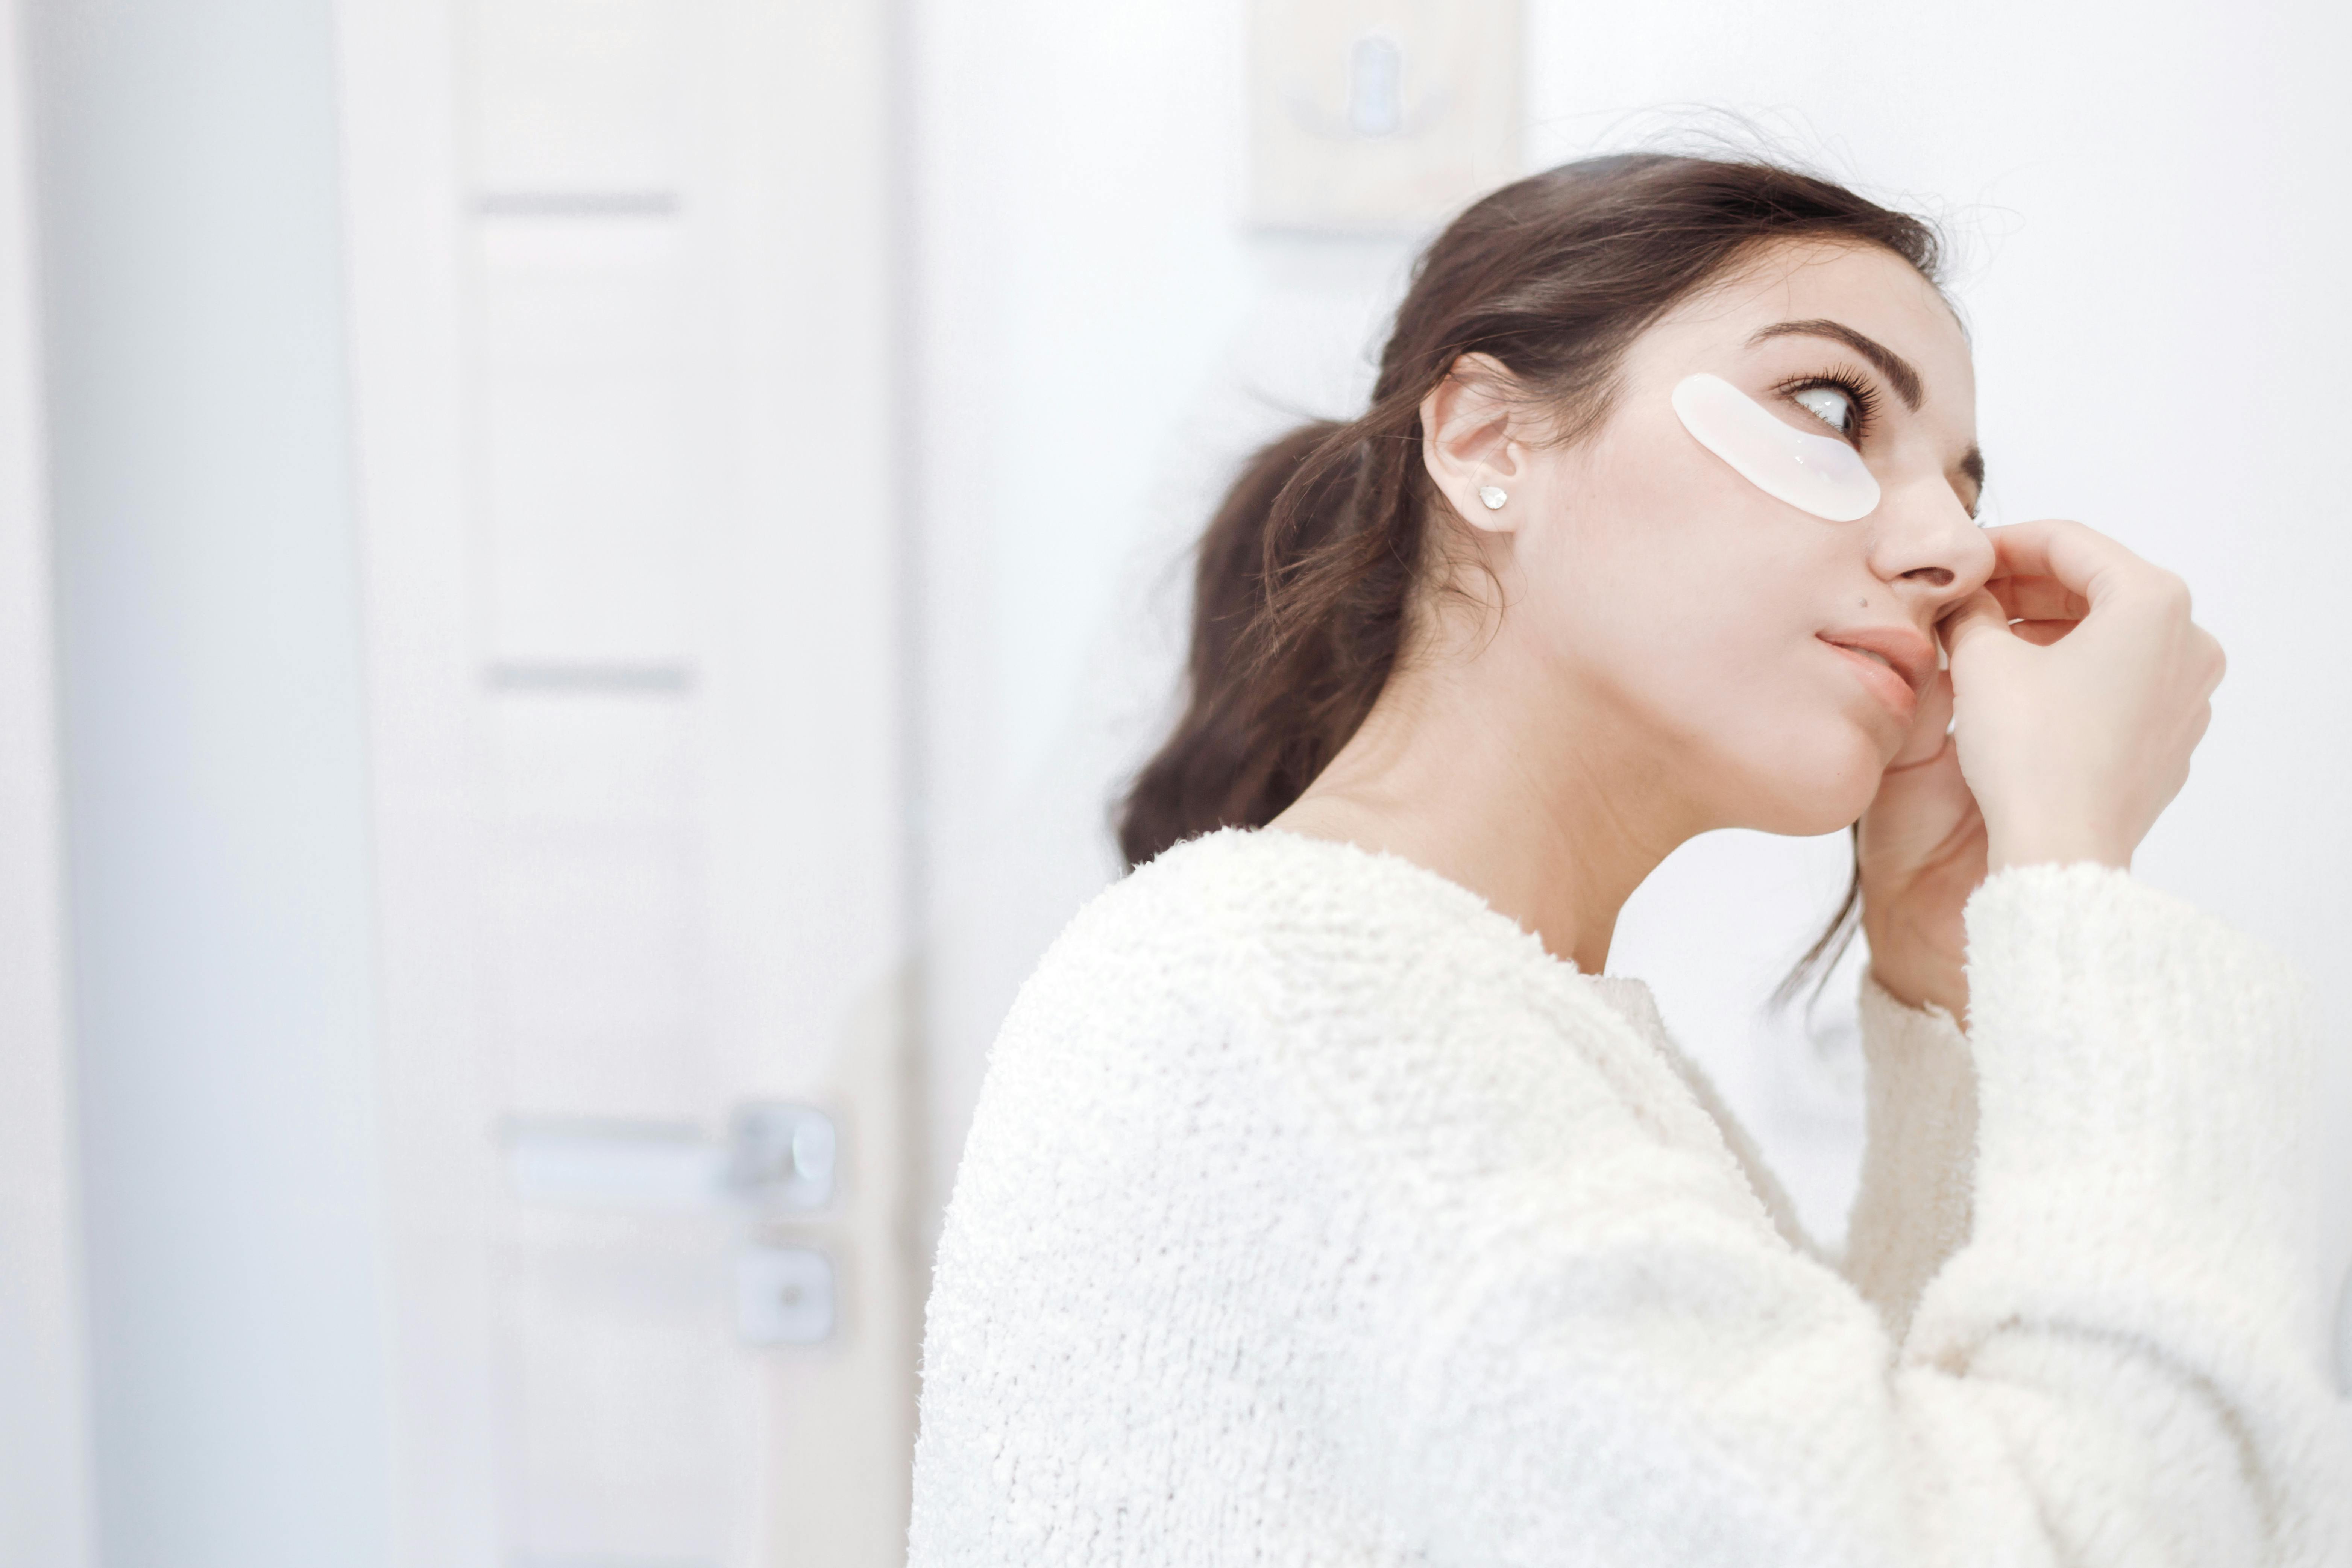
Beauty and Skincare Flat Lays
Key Elements:
- Product packaging as hero items
- Tools (brushes, applicators, sponges)
- Texture elements (petals, cotton, ribbons)
- Color-coordinated groupings
Styling Tips:
- Clean products thoroughly before shooting
- Use makeup swatches to add color and demonstrate texture
- Include "evidence of use" for authenticity (slightly open compacts, used brushes)
- Coordinate with brand colors for sponsored content
Recommended Props:
- Marble or tile surfaces
- Fresh flowers or greenery
- Pretty dishes for holding small items
- Decorative mirrors
White Marble Contact Paper Backdrop → — Affiliate link
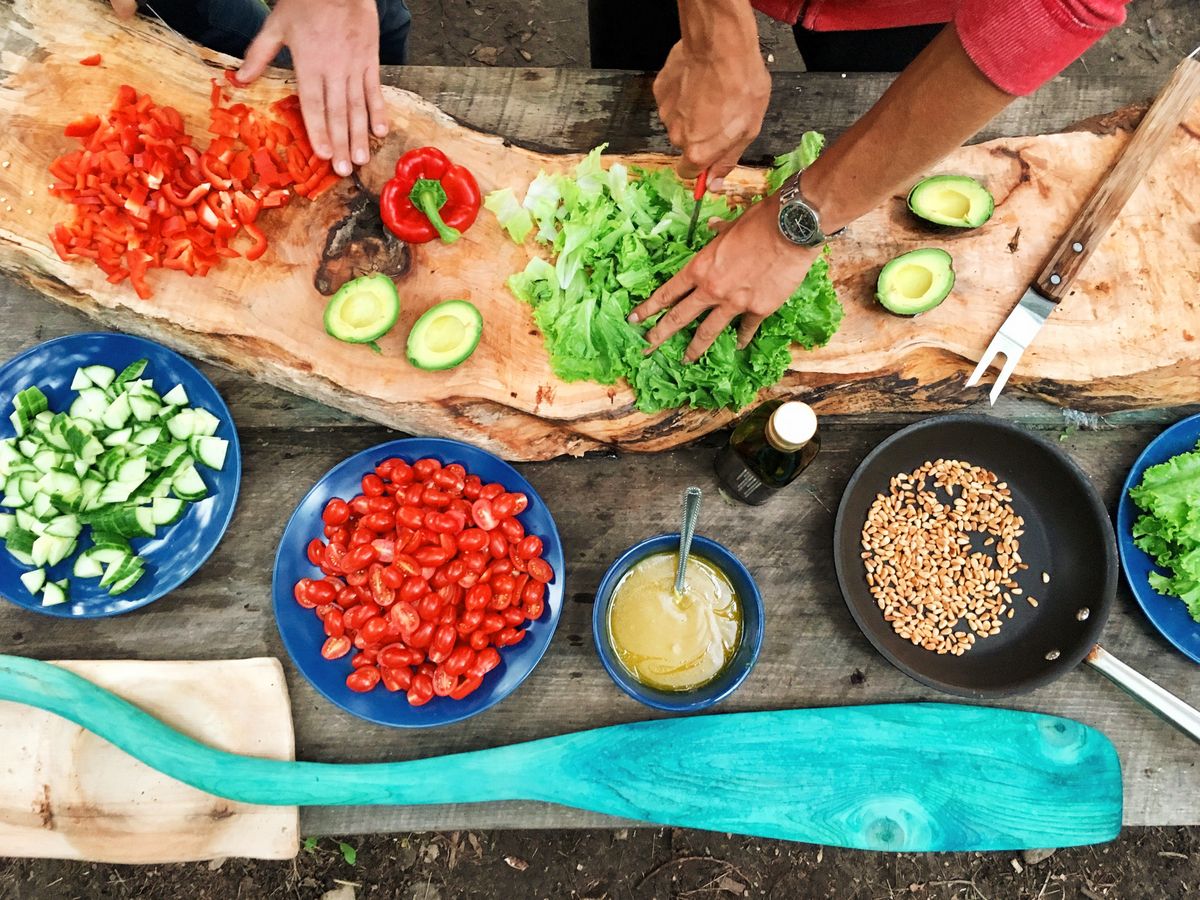
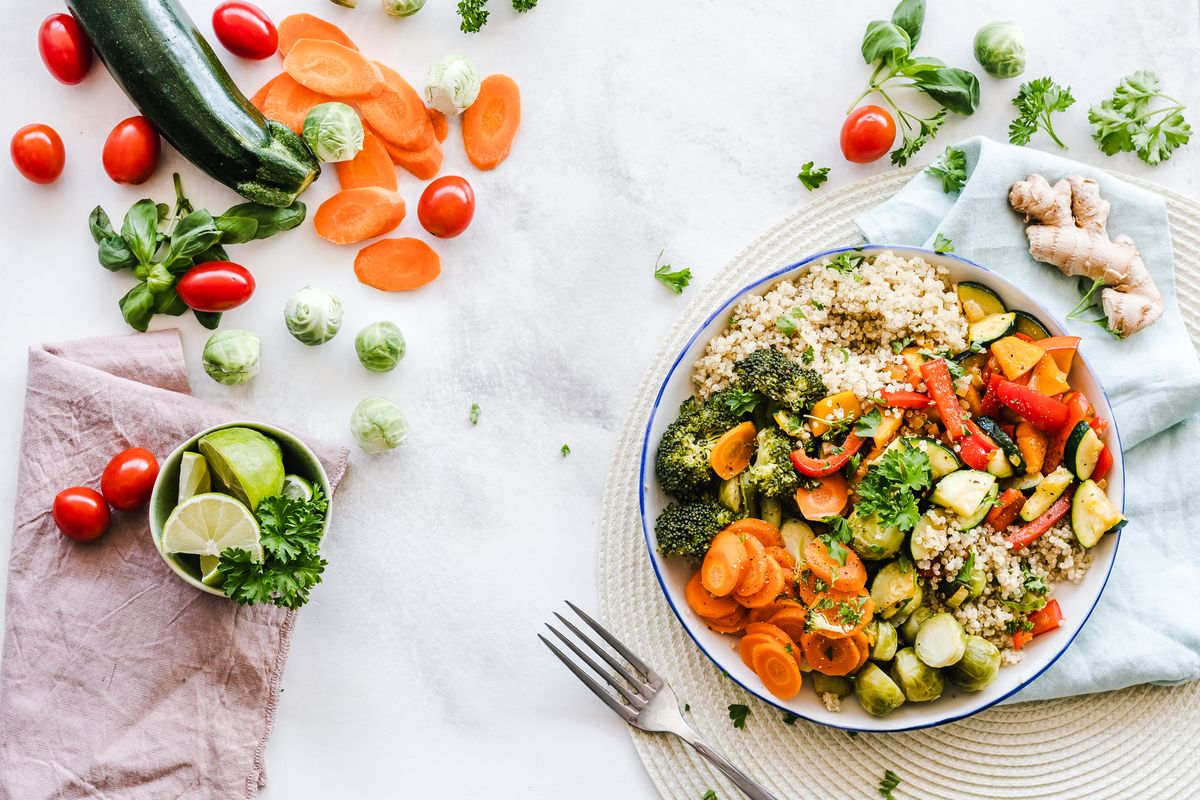
Food Photography Flat Lays
Key Elements:
- The hero dish as the focal point
- Ingredients scattered naturally
- Utensils suggesting the eating experience
- Linens and tableware setting the scene
Styling Tips:
- Shoot food at its freshest—have everything ready before cooking finishes
- Use the "messy" technique for natural, lived-in looks
- Include hands in the frame for scale and human connection
- Vary heights with cake stands, cutting boards, or stacked plates
Recommended Props:
- Rustic cutting boards
- Vintage silverware
- Linen napkins in natural tones
- Raw ingredients for context
Fashion and Accessories
Key Elements:
- Clothing laid flat or styled to suggest form
- Accessories that complement the outfit
- Seasonal elements for context
- Brand tags visible for recognition
Styling Tips:
- Use tissue paper or garment bags to create volume in clothing
- Include lifestyle elements (coffee, sunglasses, books) that suggest the wearer's personality
- Coordinate color palettes carefully
- Shoot accessories both alone and styled together
Recommended Props:
- Velvet hangers for clothing details
- Jewelry dishes and stands
- Fashion magazines for editorial context
- Seasonal elements (leaves, flowers, shells)
Stationery and Workspace
Key Elements:
- Desk accessories and tools
- Technology (laptops, phones, tablets)
- Beverages and snacks
- Organizational elements
Styling Tips:
- Create realistic "in use" scenarios
- Include handwriting or notes for personality
- Balance productivity items with comfort elements
- Use desk mats and coasters to define spaces
Recommended Props:
- Desk organizers and trays
- Plants for life and color
- Candles for ambiance
- Notebooks and planners
U Brands Desktop Accessories → — Affiliate link
Travel and Lifestyle
Key Elements:
- Destination-specific items
- Passport, tickets, and travel documents
- Camera equipment and maps
- Local souvenirs and treasures
Styling Tips:
- Tell a story about the destination or upcoming trip
- Include maps with routes highlighted
- Mix practical items with aspirational elements
- Use location-appropriate colors and textures
Color Theory and Palette Selection
Color choices dramatically impact the mood and effectiveness of your flat lay photography.
Understanding Color Psychology
Warm Colors (Red, Orange, Yellow):
- Energy, excitement, appetite
- Best for: Food, fitness, adventure brands
Cool Colors (Blue, Green, Purple):
- Calm, trust, sophistication
- Best for: Wellness, technology, finance brands
Neutral Colors (Black, White, Gray, Beige):
- Timelessness, elegance, versatility
- Best for: Luxury brands, minimalist aesthetics
Creating Color Palettes
Monochromatic: Various shades and tints of a single color. Creates sophisticated, cohesive looks.
Complementary: Colors opposite each other on the color wheel (blue/orange, red/green). Creates vibrant, high-contrast images.
Analogous: Colors adjacent on the color wheel (blue, blue-green, green). Creates harmonious, serene compositions.
Neutral with Pop: Mostly neutral background with one bold accent color. Draws attention to specific products.
Seasonal Color Trends
Spring: Pastels, fresh greens, soft florals
Summer: Bright primaries, ocean blues, sun-kissed yellows
Fall: Warm earth tones, burnt orange, deep reds
Winter: Cool blues, crisp whites, metallic accents, rich jewel tones
Color Consistency for Branding
Maintain consistent color palettes across your flat lays to build recognizable visual identity. Create a "brand color board" with your go-to shades and reference it before styling.
Props and Backgrounds: Building Your Collection
A well-curated prop collection elevates your flat lay photography and streamlines your workflow.
Essential Backgrounds
Solid Surfaces:
- White foam boards (cheap, versatile, replaceable)
- Marble-look contact paper
- Wood-grain vinyl backdrops
- Colored cardstock in brand colors
Textured Surfaces:
- Linen and canvas fabrics
- Weathered wood planks
- Concrete or stone surfaces
- Tile samples
Specialty Backdrops:
- Savage seamless paper (professional standard)
- Replica surfaces (designed specifically for photography)
- Custom-painted canvases
- Natural elements (grass, sand, leaves)
Replica Surfaces Photography Backdrops → — Affiliate link
Building Your Prop Collection
Start With Basics:
- White and neutral textiles
- Simple ceramic dishes in various sizes
- Wooden cutting boards and trays
- Clear glassware
Add Character:
- Vintage books and magazines
- Dried flowers and botanicals
- Decorative ribbon and twine
- Interesting stones and shells
Invest in Quality:
- Linen napkins in multiple colors
- Marble or stone surfaces
- Quality fake plants (lower maintenance than real)
- Versatile storage containers
Prop Organization
- Store by color for quick palette building
- Use clear bins for visibility
- Label containers for efficiency
- Keep a prop inventory list
- Regularly purge unused items
Where to Find Props
Budget-Friendly:
- Thrift stores and estate sales
- Dollar stores for basics
- Nature (flowers, branches, stones)
- Your own home (repurpose everyday items)
Investment Pieces:
- Specialty photography prop shops
- Artisan markets for unique handmade items
- High-quality textiles and ceramics
- Replica photography surfaces
Post-Processing for Professional Results
Even perfectly styled flat lay photography benefits from thoughtful editing.
Editing Software Options
Mobile Apps:
- VSCO: Excellent filters and film emulation
- Lightroom Mobile: Professional RAW editing on phone
- Snapseed: Powerful selective adjustments
- A Color Story: Bright, cheerful presets perfect for flat lays
Adobe Lightroom Mobile → — Affiliate link
Desktop Software:
- Adobe Lightroom: Industry standard for photo organization and editing
- Adobe Photoshop: Advanced retouching and compositing
- Capture One: Superior color editing, popular with product photographers
- Luminar AI: AI-powered editing for quick professional results
Essential Adjustments
Exposure and Contrast:
- Ensure whites are truly white (but not blown out)
- Add contrast for punch, or reduce for airy looks
- Use tone curves for precise control
White Balance:
- Neutral grays should appear neutral (not warm or cool)
- Consistent white balance across a series is crucial
- Shoot a gray card for accurate correction
Color Adjustments:
- Boost saturation for vibrant product shots
- Reduce saturation for muted, sophisticated looks
- Use HSL sliders to target specific colors
Sharpening:
- Apply appropriate sharpening for web or print
- Use masking to sharpen only key elements
- Avoid over-sharpening which creates artifacts
Flat Lay Specific Techniques
Perspective Correction:
Fix slight camera tilt using the transform/geometry tools. Perfectly perpendicular lines are crucial for professional flat lays.
Background Cleanup:
Remove dust, unwanted shadows, or distractions using clone/healing tools. A clean background elevates the entire image.
Selective Adjustments:
Brighten specific products, enhance colors on key elements, or darken edges to draw focus to the center.
Creating Consistency:
Save editing presets to apply consistent looks across entire shoots or Instagram feeds.
Common Flat Lay Mistakes to Avoid
Learning from common errors accelerates your flat lay photography improvement.
Technical Mistakes
Off-Center Camera Angle:
Even slight tilts ruin the flat lay effect. Use grids, levels, or post-processing perspective correction to ensure true overhead angles.
Uneven Lighting:
Harsh shadows or bright hotspots distract from your subject. Invest time in proper lighting setup.
Blurry Images:
Camera shake ruins sharpness. Use tripods, remote shutters, and adequate light to ensure crisp photos.
Styling Mistakes
Overcrowding:
Cramming too many elements creates visual chaos. Embrace negative space and edit ruthlessly.
Inconsistent Styling:
Mixing too many styles (rustic with modern, minimal with maximal) creates confusion. Maintain cohesive themes.
Ignoring Color Harmony:
Clashing colors undermine even the best arrangements. Plan palettes before styling.
Flat, Lifeless Arrangements:
Perfect symmetry and spacing can feel sterile. Add organic touches: imperfect spacing, natural shadows, lived-in details.
Workflow Mistakes
Not Planning Ahead:
Winging it wastes time and produces inconsistent results. Sketch arrangements or create mood boards before shooting.
Forgetting to Clean:
Dust, fingerprints, and smudges are magnified in flat lay photography. Clean everything before arranging.
Rushing the Process:
Great flat lays require time. Allow 30-60 minutes for styling complex arrangements.
FAQ
What is flat lay photography?
Flat lay photography is a style where objects are arranged on a flat surface and photographed from directly above (90-degree overhead angle). This perspective creates a graphic, two-dimensional look that highlights arrangement, color, and composition. It's popular for social media, product photography, and editorial content.
What equipment do I need for flat lay photography?
Essential equipment includes: a camera (smartphone or dedicated camera), a tripod or overhead mounting system, adequate lighting (natural window light or artificial lights), and backgrounds/surfaces. Optional but helpful: remote shutter, reflectors for fill light, and a variety of props for styling.
Can I do flat lay photography with my phone?
Absolutely! Modern smartphones produce excellent flat lay images. Use the grid overlay feature for straight alignment, ensure adequate lighting, and shoot in the highest resolution available. Many professional creators shoot flat lays exclusively on phones.
What's the best lighting for flat lay photography?
Soft, diffused natural light from a large window is ideal for beginners—shoot on overcast days or diffuse harsh sun with sheer curtains. For artificial light, use two softbox lights at 45-degree angles for even, shadow-free illumination. Avoid direct overhead lighting which creates harsh shadows.
How do I style a flat lay?
Start with a clear concept or story. Choose a color palette and background. Place your hero item first, then add supporting elements using compositional techniques like the rule of thirds, odd numbers, and visual flow patterns. Step back frequently to assess the overall arrangement, and don't be afraid to remove elements—less is often more.
What background should I use for flat lays?
White foam board is the most versatile starter background—cheap, readily available, and works for most subjects. Build your collection with: marble surfaces (contact paper works well), wood textures, colored cardstock, linen fabrics, and specialty photography backdrops. Choose backgrounds that complement your subject without competing.
How do I get the overhead angle right?
Position your camera directly above the center of your arrangement, parallel to the surface. Use a tripod with an overhead arm, or shoot from a step ladder for large setups. Enable grid lines on your camera, and use a level app or physical level to ensure true 90-degree positioning. Correct minor tilts in post-processing.
What are the best props for flat lay photography?
Essential props vary by niche but versatile basics include: linen napkins, ceramic dishes, vintage books, fresh or dried flowers, ribbon and twine, decorative stones, and interesting textiles. Build your collection gradually, focusing on neutral pieces that work across multiple setups, then add specialty items for specific themes.
How do I edit flat lay photos?
Start with exposure and white balance correction. Adjust contrast and saturation to match your desired mood. Use perspective/geometry tools to ensure perfect alignment. Clean up distractions with healing/clone tools. Apply sharpening appropriate for your output (web vs. print). Save presets for consistent looks across multiple images.
How do I make money with flat lay photography?
Monetization opportunities include: brand partnerships and sponsored content, product photography services for businesses, selling styled stock photos, teaching workshops or creating courses, affiliate marketing through product recommendations, and content creation for marketing agencies. Build a strong portfolio and social media presence to attract opportunities.
Conclusion: Your Flat Lay Photography Journey Starts Now
Flat lay photography is equal parts art and craft—a blend of technical skill, creative vision, and styling intuition. The good news? Every element can be learned and improved with practice.
Remember these key principles:
- Lighting is everything: Invest time in mastering light before buying expensive equipment
- Composition creates impact: Study arrangements that catch your eye and analyze why they work
- Less is often more: Negative space and restraint create sophistication
- Consistency builds brand: Develop recognizable color palettes and styling approaches
- Practice accelerates progress: Shoot regularly, experiment constantly, and learn from every frame
Your first flat lays won't be perfect, and that's exactly how it should be. Each setup teaches something new about light, composition, and styling. Within weeks of consistent practice, you'll see dramatic improvement. Within months, you'll develop a signature style.
The overhead perspective offers a unique way of seeing the world—transforming ordinary objects into compelling visual stories. Whether you're building a brand, documenting your life, or exploring a creative outlet, flat lay photography provides endless opportunities for expression.
Set up your first flat lay today. Your future self—the one creating stunning, scroll-stopping images—will thank you for starting.
Get Essential Flat Lay Props → — Affiliate link
Last updated: March 17, 2024. This post contains affiliate links, meaning we may earn a small commission at no extra cost to you. We only recommend products we genuinely believe in.
Exit-Intent Popup Configuration
popup_config:
  trigger: exit_intent
  title: "Ready to Create Stunning Flat Lays?"
  subtitle: "Download our free Flat Lay Style Guide with 20+ color palettes, prop lists by niche, and a complete styling checklist!"
  cta_text: "Get Free Style Guide"
  cta_color: "#F472B6"
  success_message: "Check your email for your Flat Lay Style Guide!"
  delay_seconds: 0
  show_once_per_session: true
  mobile_trigger: scroll_80_percent
Internal Linking Suggestions
- Link to photography equipment basics post
- Link to Instagram growth strategies post
- Link to product photography guide
- Link to color theory for creators post
- Link to photo editing workflow post