DIY Home Decor: 30 Handmade Ideas to Transform Your Space on Any Budget

Transform your living space with these creative, budget-friendly DIY home decor projects that bring personality and style to every room
Meta Description: Discover 30 stunning DIY home decor projects with step-by-step instructions, budget breakdowns, and shopping lists. From beginner-friendly crafts to advanced furniture makeovers, transform your space today!
Introduction: Why DIY Home Decor is Transforming Modern Living Spaces
There's something undeniably magical about walking into a room filled with pieces you've created with your own hands. DIY home decor has evolved from a budget necessity to a sought-after design aesthetic that celebrates individuality, sustainability, and the satisfaction of making something beautiful from scratch.
In an era of mass-produced furniture and cookie-cutter interiors, handmade home decor stands out. It tells a story. It reflects your personality. And perhaps most importantly, it transforms a house into a home—your home.
The Rising Popularity of Handmade Home Decor
The DIY home decor movement has exploded in recent years, with Pinterest reporting over 400 million monthly searches for home improvement and decor ideas. According to a 2024 survey by the Home Improvement Research Institute, 67% of homeowners have completed at least one DIY decor project in the past year, with the average person spending between $200-500 on materials for their creative endeavors.
But why has DIY home decor become so popular?
1. Cost-Effective Beauty
High-end home decor can cost thousands. A custom macrame wall hanging from a boutique might set you back $300, but making your own costs less than $50 in materials. That designer-inspired side table? $800 at a furniture store, or $80 in supplies and a weekend of your time.
2. Complete Customization
When you create your own decor, you're not limited to what's on store shelves. Want a throw pillow in that exact shade of sage green to match your curtains? Done. Need a bookshelf that fits perfectly in that awkward corner? You can build it to precise specifications.
3. Sustainable Living
DIY projects often incorporate upcycling—transforming old or discarded items into something new and beautiful. This approach reduces waste, keeps items out of landfills, and gives new life to pieces with history and character.
4. Therapeutic Benefits
Numerous studies have shown that creative activities reduce stress and anxiety. The focused, mindful nature of DIY projects provides a mental break from screens and digital overwhelm. There's genuine satisfaction in creating something tangible.
5. Unique, One-of-a-Kind Pieces
No one else will have the exact same woven wall basket or hand-painted canvas that you create. Your DIY home decor becomes a conversation starter and a true reflection of your personal style.
What You'll Learn in This Guide
This comprehensive guide features 30 detailed DIY home decor projects spanning five categories:
- Wall Decor Projects (10 ideas) - From macrame to gallery walls
- Furniture Makeovers (8 projects) - Transform existing pieces
- Textile Projects (6 tutorials) - Curtains, pillows, and more
- Small Decor Items (6 crafts) - Terrariums, candles, and accessories
Each project includes:
- ⏱️ Time estimate for planning
- 💰 Budget breakdown with shopping lists
- 🎯 Skill level rating (Beginner/Intermediate/Advanced)
- 🛠️ Materials and tools needed
- 📋 Step-by-step instructions
- 🏷️ Affiliate links to recommended products
- 💡 Pro tips for best results
Whether you're a complete beginner looking for your first project or an experienced crafter ready for a challenge, you'll find inspiration and guidance here. Let's transform your space together!
Part 1: Getting Started with DIY Home Decor
Before diving into the projects, let's cover the fundamentals that will set you up for success. Having the right tools, understanding safety protocols, knowing where to source materials, and grasping upcycling principles will make your DIY journey smoother and more enjoyable.
Essential Tools for DIY Home Decor
Every crafter needs a solid foundation of tools. While you don't need everything at once, investing in quality basics will serve you across countless projects.
Basic Tool Kit (Under $100)
These essentials will handle the majority of beginner to intermediate projects:
| Tool | Purpose | Recommended Product | Price |
|---|---|---|---|
| Hot Glue Gun | Quick adhesion for decor items | Surebonder Dual-Temp Glue Gun | $12 |
| Scissors Set | Fabric, paper, and detail cutting | Fiskars Titanium Scissors 3-Pack | $18 |
| Measuring Tape | Accurate measurements | Stanley 25-Foot Tape Measure | $15 |
| Level | Hanging items straight | Torpedo Level | $10 |
| Hammer | Basic assembly and hanging | Claw Hammer 16oz | $12 |
| Screwdriver Set | Furniture assembly | Magnetic Screwdriver Set | $20 |
| Pliers Set | Wire work and gripping | Needle Nose Pliers 3-Piece | $15 |
| Utility Knife | Precise cutting | OLFA Comfort Grip Knife | $8 |
Total Basic Kit: ~$110
Intermediate Tool Kit (Additional $150-200)
As you advance, these tools expand your capabilities:
| Tool | Purpose | Recommended Product | Price |
|---|---|---|---|
| Power Drill | Furniture building, wall mounting | DEWALT 20V Cordless Drill | $99 |
| Staple Gun | Upholstery, fabric projects | Arrow T50 Staple Gun Kit | $25 |
| Paint Sprayer | Smooth furniture finishes | Wagner Spraytech Handheld | $79 |
| Sewing Machine | Textile projects | Brother XM2701 Sewing Machine | $140 |
| Miter Saw | Precise wood cuts | DEWALT Compound Miter Saw | $199 |
| Orbital Sander | Smooth wood surfaces | BLACK+DECKER Orbital Sander | $35 |
Tool Maintenance Tips
🛠️ Keep tools clean and dry - Moisture causes rust and dulls blades
🛠️ Store in a designated toolbox or wall organizer - Wall-Mounted Tool Organizer
🛠️ Sharpen cutting tools regularly - Multi-Sharpener Tool
🛠️ Label everything - Saves time searching during projects
🛠️ Invest in tool insurance for expensive power tools
Safety Basics: Protecting Yourself While Creating
Safety isn't glamorous, but it's essential. These precautions will keep you crafting for years to come.
Personal Protective Equipment (PPE)
| Item | When to Use | Recommendation |
|---|---|---|
| Safety Glasses | Power tool use, painting, sanding | 3M Safety Glasses - $8 |
| Work Gloves | Handling rough materials, chemicals | Mechanix Wear Gloves - $15 |
| Dust Mask | Sanding, spray painting, working with insulation | N95 Respirator Masks - $18/10pk |
| Hearing Protection | Power saw, router, loud tools | 3M Earmuffs - $22 |
| Apron | Painting, staining, messy projects | Waxed Canvas Work Apron - $28 |
Workshop Safety Rules
⚠️ Never bypass safety guards on power tools
⚠️ Unplug tools when changing blades or bits
⚠️ Keep a fire extinguisher nearby when working with heat or chemicals
⚠️ Maintain good ventilation - Open windows, use fans when painting
⚠️ Secure your workpiece - Use clamps, never hold by hand near blades
⚠️ Stay alert - No alcohol before or during projects
⚠️ Know your limits - Some electrical/plumbing work requires professionals
First Aid Kit Essentials
Every DIYer should have: Comprehensive First Aid Kit - $25
- Adhesive bandages (various sizes)
- Gauze pads and medical tape
- Antiseptic wipes
- Tweezers (for splinters)
- Eye wash solution
- Burn cream
- Instant cold packs
Where to Source Materials for DIY Home Decor
Knowing where to shop can save you 50-70% on materials. Here's where savvy DIYers find their supplies:
Budget-Friendly Sources
Thrift Stores & Estate Sales
- Best for: Furniture to upcycle, frames, baskets, fabric, vases
- Savings: 70-90% off retail
- Pro tip: Visit on restocking days (usually Monday/Tuesday)
- Recommended: Goodwill, Salvation Army, local charity shops
Dollar Stores
- Best for: Basic supplies, vases, candles, storage containers, craft basics
- Savings: 80-90% off craft store prices
- Quality check: Some items are flimsy—inspect before buying
- Recommended: Dollar Tree, Dollar General, Family Dollar
Habitat for Humanity ReStores
- Best for: Lumber, hardware, paint, tile, doors, windows
- Savings: 50-75% off home improvement stores
- Bonus: Purchases support affordable housing
- Find your local store: Habitat ReStore Locator
Facebook Marketplace & Craigslist
- Best for: Free or cheap furniture, pallets, scrap materials
- Savings: 60-100% (many free items)
- Safety: Meet in public places, bring a friend
Clearance Sections
- Best for: Paint (mistinted colors), fabric remnants, discontinued items
- Savings: 50-90% off
- Check regularly: Inventory changes daily
Mid-Range Sources
Home Improvement Stores
- Best for: Lumber, hardware, paint, tools
- Recommended: Home Depot, Lowe's, Ace Hardware
- Pro tip: Open a Pro Xtra or MyLowe's account for discounts
Craft Stores
- Best for: Specialty supplies, fabric, yarn, beads
- Recommended: Michaels, Jo-Ann Fabrics, Hobby Lobby
- Pro tip: Download their apps for weekly 40-50% off coupons
Online Marketplaces
- Best for: Bulk supplies, hard-to-find items
- Recommended:
- Amazon - Fast shipping, wide selection
- Etsy - Unique handmade supplies
- Tempered Networks - Wholesale craft supplies
Premium Sources
Specialty Woodworking Stores
- Best for: Exotic woods, high-quality hardware
- Recommended: Rockler, Woodcraft
Art Supply Stores
- Best for: Professional paints, canvases, brushes
- Recommended: Blick Art Materials, Cheap Joe's
Free Material Sources
Construction Sites (with permission)
- Scrap lumber, pallets, materials headed to landfill
- Always ask site manager first
Craigslist "Free" Section
- Furniture, pallets, moving boxes, scrap materials
- Act fast—good items go quickly
Curbside on Trash Day
- One person's trash is another's project material
- Target affluent neighborhoods for better quality
Your Own Home
- Old clothing → fabric for projects
- Cardboard boxes → templates and prototypes
- Glass jars → storage and vases
- Wine corks, bottle caps → craft supplies
Upcycling Principles: The Art of Creative Transformation
Upcycling transforms unwanted items into something of higher quality or value than the original. It's sustainable, budget-friendly, and results in unique pieces with character.
What CAN Be Upcycled
✅ Solid wood furniture - Sand and refinish indefinitely
✅ Metal items - Paint, weld, repurpose
✅ Glass containers - Paint, etch, use as-is
✅ Natural materials - Driftwood, stones, branches
✅ Textiles - Cut, sew, dye, patch
✅ Frames and mirrors - Paint, reback, resize
What to AVOID Upcycling
❌ Particle board furniture - Doesn't hold up to refinishing
❌ Items with lead paint - Health hazard, especially for children's items
❌ Moldy or water-damaged pieces - Health risks, structural issues
❌ Upholstered items with bed bugs - Difficult to salvage safely
❌ Electrical items - Unless you're a certified electrician
Upcycling Techniques by Material
Wood
- Sanding: Start with 80-grit, work up to 220-grit
- Staining: Pre-stain conditioner prevents blotchiness
- Painting: Clean → Sand → Prime → Paint → Seal
- Distressing: Sand edges, use antiquing wax
Metal
- Cleaning: Remove rust with wire brush or naval jelly
- Painting: Use rust-inhibiting primer first
- Patina: Use vinegar/salt solutions or commercial patina solutions
Glass
- Etching: Cream etching or sandblasting
- Painting: Specialty glass paints or spray paint for glass
- Frosting: Frosting spray or window film
Fabric
- Dyeing: Rit dye, natural dyes (avocado pits, turmeric)
- Printing: Block printing, screen printing, potato stamps
- Applique: Sew fabric shapes onto base fabric
Environmental Impact of Upcycling
Upcycling isn't just trendy—it's impactful:
- Diverts 9.8 million tons of furniture from landfills annually
- Reduces demand for new resource extraction
- Cuts carbon footprint by 70% vs. buying new
- Saves approximately 1,000 gallons of water per upcycled piece of furniture
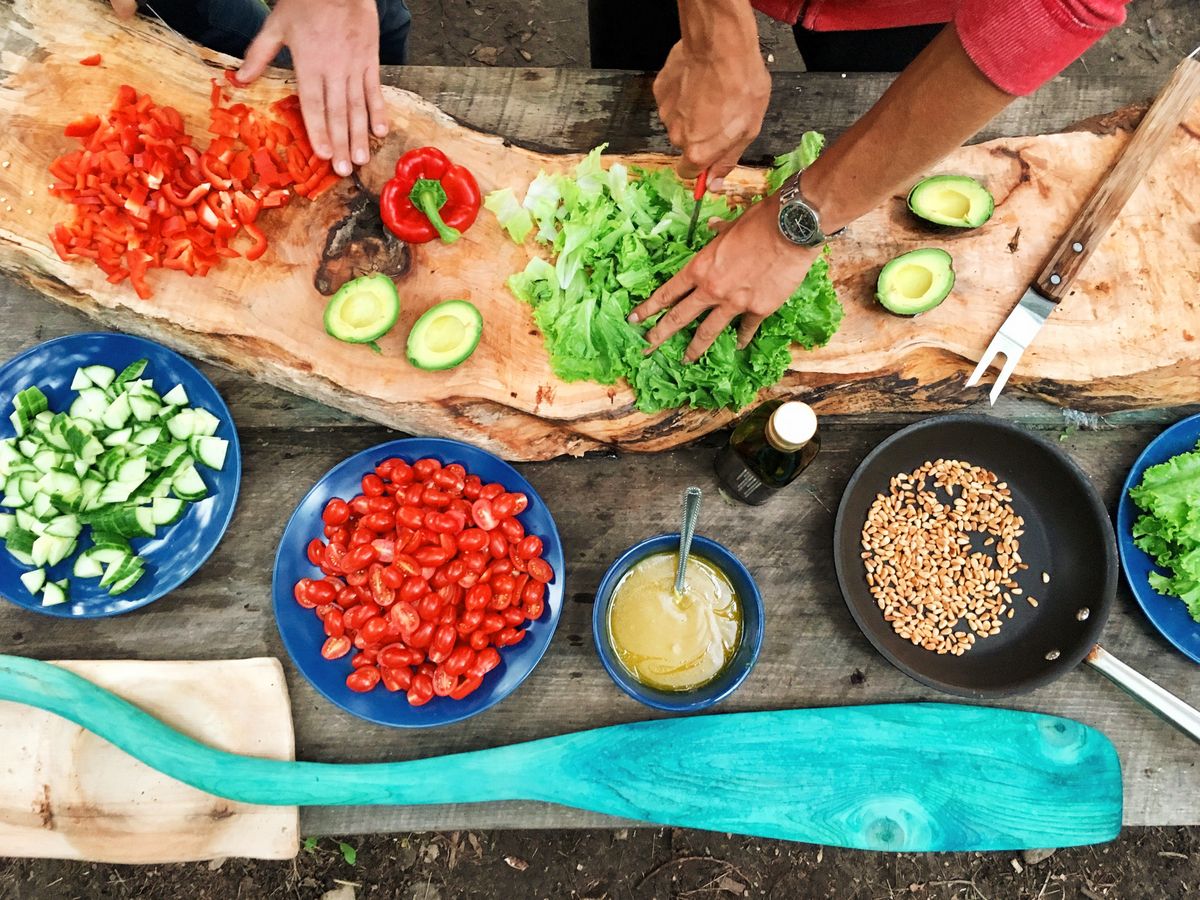
Part 2: Wall Decor Projects (10 Ideas)
Walls are the canvas of your home. These 10 projects will help you create stunning focal points, gallery displays, and textured elements that bring personality to any room.
Project 1: Boho Macrame Wall Hanging
Skill Level: Beginner | Time: 3-4 hours | Budget: $25-35

Macrame has made a massive comeback, bringing bohemian warmth and textural interest to modern interiors. This project creates a statement piece that costs a fraction of store-bought alternatives.
Materials Needed
- 3mm Natural Cotton Cord - $15 (200ft)
- Wooden Dowel or Driftwood - $5-10
- Tape Measure - $15
- Scissors
- Comb (for fraying ends)
Step-by-Step Instructions
Step 1: Prepare Your Cord
Cut 16 cords, each 12 feet long. Fold each cord in half and attach to your dowel using a Lark's Head Knot (fold loop over dowel, pull ends through).
Step 2: Create the Square Knot Pattern
- Take 4 cords (2 from each adjacent Lark's Head)
- Create Square Knots: Left cord over center, right cord over left, under center, through loop. Reverse for second half.
- Continue across the row, creating 8 square knots
Step 3: Build the Pattern
- Row 2: Skip first 2 cords, make 7 square knots, leaving last 2 loose
- Row 3: Skip first 4 cords, make 6 square knots
- Continue this pattern, reducing by one knot per row, creating a triangle
Step 4: Add the Center Detail
In the middle of your triangle, create alternating Half Hitch Knots (spiral knots) using 4-cord sections. This creates texture and visual interest.
Step 5: Finish the Bottom
Trim all cords to desired length—straight across for modern look, or at an angle for boho feel. Comb out the ends to create fringe.
Step 6: Hang
Attach a hanging cord to each end of the dowel. Use a wall hook rated for at least 5 lbs.
Pro Tips
💡 Pre-wash your cord to prevent shrinkage later
💡 Use a clipboard to hold your work while knotting
💡 Spray with fabric stiffener if you want a more structured look
💡 Add beads or shells between knots for extra boho flair
Variations
- Color: Dip-dye the bottom half in Rit Dye - $6
- Size: Double the cord length for an oversized statement piece
- Shape: Create multiple small hangings for a gallery effect
Project 2: Pressed Flower Botanical Frames
Skill Level: Beginner | Time: 2-3 days (mostly pressing time) | Budget: $20-30 per frame

Capture the ephemeral beauty of flowers in timeless botanical art. These delicate frames add a touch of nature and romance to any space.
Materials Needed
- Fresh flowers (wildflowers, ferns, leaves work best)
- Thick Books or Flower Press - $20
- Parchment Paper - $8
- Floating Frame - $12-18
- Tweezers
- Acid-Free Glue - $6
Step-by-Step Instructions
Step 1: Select and Harvest Flowers
Choose flowers that are fresh but fully open. Best varieties: pansies, daisies, ferns, lavender, baby's breath. Avoid thick, fleshy flowers like roses or tulips—they don't press well.
Step 2: Press the Flowers
- Place parchment paper inside a heavy book
- Arrange flowers face down, ensuring they don't overlap
- Close the book and weigh it down with additional heavy books
- Wait 7-10 days for complete drying
Step 3: Plan Your Composition
Before gluing, arrange flowers on the frame backing. Try different layouts: symmetrical, cascading, scattered. Take a photo of your favorite arrangement for reference.
Step 4: Attach the Flowers
Using tweezers for precision, apply tiny dots of acid-free glue to flower backs. Press gently into place. Start with larger elements, fill in with smaller flowers.
Step 5: Seal and Frame
Once glue is dry (1 hour), carefully place the glass back over your arrangement. Seal the floating frame according to manufacturer instructions.
Step 6: Display
Keep out of direct sunlight to prevent fading. These look stunning in groups of 3-4 with coordinating flower colors.
Pro Tips
💡 Press flowers when they're dry - Morning dew prevents proper drying
💡 Use a microwave flower press for same-day results: Microfleur - $25
💡 Spray with UV-resistant sealant to prevent fading: Krylon UV Spray - $12
💡 Layer different textures - Combine flowers, ferns, and delicate grasses
Project 3: Abstract Canvas Art
Skill Level: Beginner | Time: 2-3 hours + drying time | Budget: $30-50

You don't need to be Picasso to create gallery-worthy art. Abstract painting is about emotion, color, and movement—not technical skill. This project guarantees a unique piece that perfectly matches your decor.
Materials Needed
- Stretched Canvas - $15-30 (size dependent)
- Acrylic Paint Set - $20 (choose 3-4 coordinating colors)
- Paint Brushes Variety Pack - $12
- Palette Knife - $8
- Disposable Palette - $5
- Painter's Tape - $6
- Old sheets or drop cloth
Step-by-Step Instructions
Step 1: Prepare Your Space
Lay down drop cloths. Set up canvas on an easel or propped against a wall. Have water and paper towels handy for cleaning brushes.
Step 2: Choose Your Color Palette
Select 3-4 colors that work with your room. Options:
- Monochromatic: Various shades of one color
- Complementary: Opposite colors on color wheel (blue/orange, purple/yellow)
- Neutral: Black, white, gray, beige with one accent color
- Earthy: Terracotta, sage, cream, brown
Step 3: Apply Base Layer
Using your largest brush, cover the entire canvas with your lightest color. This creates cohesion. Let dry completely (30 minutes).
Step 4: Build Texture and Layers
- Use a dry brush technique: minimal paint, quick strokes
- Try palette knife application: scoop paint, smear across canvas
- Experiment with layering: let each layer partially dry before adding next
- Create movement: directional strokes, circular motions, or random energy
Step 5: Add Detail and Contrast
Once base layers are established:
- Add dark accents for depth
- Use white or light colors to highlight
- Try splattering: load brush and flick paint for organic texture
- Use tape to create geometric shapes (remove while paint is slightly wet)
Step 6: Step Back and Evaluate
View from across the room. Does it need more contrast? A focal point? Balance? Make final adjustments.
Step 7: Seal (Optional)
Once completely dry (24 hours), spray with acrylic sealer - $10 for protection.
Pro Tips
💡 Use Pinterest for inspiration but don't copy—find your own voice
💡 Less is more - Stop before you think you're done
💡 Take progress photos - Sometimes a "mistake" looks better in photos
💡 Create a diptych or triptych - Multiple canvases that work together
Project 4: Woven Wall Baskets
Skill Level: Intermediate | Time: 4-6 hours | Budget: $40-60

A collection of woven wall baskets brings warmth, texture, and global-inspired style to your walls. This project teaches you to weave your own statement pieces.
Materials Needed
- Basket Weaving Reed - $25 (3/8" flat reed)
- Sea Grass - $15
- Raffia - $8
- Basket Weaving Awl - $12
- Clothespins or clips
- Water spray bottle
- Towel
Step-by-Step Instructions
Step 1: Soak Your Materials
Submerge reed and sea grass in warm water for 30 minutes. They need to be pliable but not soggy.
Step 2: Create the Base (Spokes)
- Cut 8 pieces of reed, each 18" long
- Lay 4 pieces vertically, parallel, 1" apart
- Weave 4 pieces horizontally through the verticals, going over-under-over-under
- This creates a 4x4 grid base
Step 3: Start the Walls
- Bend each spoke upward at a 90-degree angle from the base
- Using a continuous weave, wrap reed around the vertical spokes
- Go over one spoke, under the next, creating a twill pattern
- Keep tension consistent but not too tight
Step 4: Build Height
Continue weaving, adding new reed as needed. Overlap ends by 3" and hide them behind spokes.
- For pattern variation, switch to sea grass for 2-3 rows
- Add raffia accents every few rows
Step 5: Shape the Basket
As you weave, gently shape the basket. For a bowl shape, flare the spokes outward slightly. For a cylinder, keep vertical.
Step 6: Create the Rim
When you've reached desired height (8-10" for wall basket):
- Bend each spoke downward, inserting it behind the spoke to its left
- Trim excess reed
- Tuck any sharp ends with your awl
Step 7: Finish
Let dry completely (24 hours). The reed will tighten as it dries, creating a sturdy basket.
Step 8: Hang
Attach a small sawtooth hanger - $5 to the back, or hang from the rim on a nail.
Pro Tips
💡 Keep a spray bottle handy - Reed dries quickly and becomes brittle
💡 Weave in front of a fan in summer—it keeps you cool and speeds drying
💡 Make 3-5 baskets in varying sizes for a gallery wall effect
💡 Dye natural reed with Rit dye for custom colors
Project 5: Modern Floating Shelves
Skill Level: Intermediate | Time: 4-5 hours | Budget: $50-80 per shelf

Floating shelves create the illusion of magic—supporting weight with no visible brackets. This project yields sturdy, custom-fit shelves that look professionally installed.
Materials Needed
- Hardwood Board - $30-50 (1x8"x6', oak or pine)
- Floating Shelf Brackets - $18/pair (hidden rod style)
- Wood Stain - $12
- Polyurethane - $15
- Drill with Forstner Bit - $25
- Level - $10
- Stud Finder - $15
- Sandpaper (120, 220 grit)
Step-by-Step Instructions
Step 1: Cut Your Shelf
Determine your desired length. Use a miter saw or have it cut at the hardware store. Standard floating shelves work best at 24-36" long.
Step 2: Drill Rod Holes
- Mark where rods will insert (measure against bracket placement)
- Use a Forstner bit slightly larger than your bracket rods (typically 1/2")
- Drill holes 4-5" deep, keeping them straight (use drill guide if available)
- Holes should be positioned so the shelf will sit flush against the wall
Step 3: Sand the Wood
Start with 120-grit sandpaper, working to 220-grit. Sand with the grain to avoid scratches. Round front corners slightly for safety and aesthetics.
Step 4: Apply Finish
- Apply wood conditioner (especially important for pine) - $8
- Apply stain with a rag, following the grain
- Wipe off excess after 5-10 minutes
- Let dry 4 hours
- Apply 2-3 coats of polyurethane, sanding lightly between coats
Step 5: Install Brackets
- Find and mark studs in your wall
- Hold bracket against wall, ensuring it's level
- Drill pilot holes through bracket into studs
- Secure with 3" lag bolts (provided or purchased separately)
- Brackets must go into studs—drywall anchors won't support significant weight
Step 6: Mount the Shelf
Slide the shelf onto the rods. It should fit snugly. If too tight, sand holes slightly. If loose, wrap rods with electrical tape to create friction.
Step 7: Style Your Shelf
Now the fun part! Style with books, plants, candles, and decorative objects. Follow the rule of thirds for visual balance.
Pro Tips
💡 Countersink bolts on the bracket for a cleaner look
💡 Use a level and mark both sides of the bracket before drilling
💡 Pre-drill shelf holes slightly deeper than needed for adjustment room
💡 Test fit before finishing—easier to adjust raw wood
💡 Weight limit: 15-25 lbs per shelf when properly installed in studs
Project 6: Curated Gallery Wall with Templates
Skill Level: Beginner | Time: 3-4 hours | Budget: $75-200 (depending on frames)

A gallery wall is the ultimate personal expression—combining art, photos, and mementos into one cohesive display. This template method ensures professional results without the frustration of endless adjustments.
Materials Needed
- Assorted Frames - $50-150 (mix sizes and styles)
- Kraft Paper or Newspaper - $5
- Painter's Tape - $6
- Level - $10
- Hammer - $12
- Picture Hanging Kit - $8
- Stud Finder - $15
Step-by-Step Instructions
Step 1: Gather Your Content
Collect art, photos, prints, and objects you want to display. Variety creates interest:
- Mix frame styles (black, wood, metal, ornate)
- Vary sizes (small, medium, large)
- Include 3D objects (small shelves, wall sculptures)
- Aim for odd numbers (7, 9, or 11 pieces look best)
Step 2: Create Templates
- Lay out kraft paper on the floor
- Trace each frame onto the paper
- Cut out the templates
- Mark on each template where the hanger is on the actual frame
Step 3: Design Your Layout
On the floor, arrange templates until you find a composition you love. Popular layouts:
- Grid: Uniform spacing, formal and structured
- Salon Style: Organic, overlapping edges, eclectic
- Linear: One or two straight lines, modern and clean
- Anchor: One large piece centered, smaller around it
Step 4: Measure and Transfer
- Measure the total width and height of your arrangement
- Find the center point of your wall
- Start with the center template, tape it to the wall
- Work outward, taping each template
- Use a level to ensure horizontal pieces are straight
- Maintain 2-3" spacing between frames
Step 5: Mark Nail Placement
- On each template, mark where the nail goes (based on your earlier hanger marks)
- Hammer nail through the paper into the wall
- Remove the template, leaving the nail
Step 6: Hang Frames
Hang each frame on its corresponding nail. Step back frequently to ensure everything looks aligned.
Step 7: Final Adjustments
Use sticky picture putty - $6 on corners to keep frames straight and prevent shifting.
Pro Tips
💡 Use a laser level for large installations: Laser Level - $25
💡 Take a photo of your floor layout before transferring to the wall
💡 Include unexpected elements: woven baskets, hats, small mirrors
💡 Create a theme: black and white photos, travel memories, botanical prints
💡 Leave room to grow: Don't fill every inch—leave space for future additions
Project 7: Painted Accent Wall Techniques
Skill Level: Intermediate | Time: 1-2 days | Budget: $100-200

An accent wall transforms a room without the commitment of painting everything. These three techniques—color blocking, geometric patterns, and ombre—create high-impact results.
Materials Needed
- Painter's Tape (FrogTape recommended) - $15
- Drop Cloths - $12
- Roller and Tray - $18
- Angled Brush - $12
- Paint Samples - $5 each
- Laser Level - $25 (optional but helpful)
- Chalk Line - $8
Technique A: Color Block
Step 1: Plan Your Design
Decide where the color block will be. Popular options:
- Upper third of wall (ceiling down)
- Lower third (chair rail height)
- Asymmetrical: 2/3 one color, 1/3 another
Step 2: Mark Your Line
Use a laser level or chalk line to mark where colors meet. Ensure the line is perfectly level—it's the difference between professional and amateur results.
Step 3: Paint the Base Color
Paint the entire wall with your lighter color. Let dry completely (4 hours minimum, overnight is better).
Step 4: Apply Painter's Tape
Place tape ALONG the line, on the side you'll paint second. Press firmly, especially along the edge.
Step 5: Paint Second Color
Paint the second section. Remove tape while paint is slightly wet (pull at 45-degree angle for cleanest edge).
Technique B: Geometric Pattern
Step 1: Design
Sketch your pattern: triangles, hexagons, or random angular shapes. Keep it simple—too many shapes looks chaotic.
Step 2: Mark with Tape
Use painter's tape to create your geometric shapes. Use a level for straight lines.
Step 3: Paint
Paint every other shape. Let dry.
Step 4: Remove Tape
Carefully remove tape before paint is completely dry.
Technique C: Ombre Effect
Step 1: Base Coat
Paint wall with your lightest color. Let dry.
Step 2: Mix Colors
Mix your light and dark colors in ratios: 3:1, 1:1, 1:3, creating a gradient.
Step 3: Section the Wall
Divide wall horizontally into 4 sections with light pencil marks.
Step 4: Apply Gradient
Paint each section with corresponding mixture, using a dry brush to blend where colors meet while still wet.
Pro Tips
💡 Always use primer for bold colors—reduces coats needed
💡 Buy samples first and paint 2x2' test areas
💡 Invest in good tape - FrogTape gives the cleanest edges
💡 Work top to bottom - Gravity is your friend
💡 Natural light matters - View your colors at different times of day
Project 8: DIY Wall Sconces
Skill Level: Advanced | Time: 6-8 hours | Budget: $60-100 per pair

These custom wall sconces combine industrial edge with warm ambiance. Hardwired sconces add value to your home and free up floor and table space.
Materials Needed
- Pendant Light Kit - $25 each
- Edison Bulbs - $12 each
- Barnwood or Reclaimed Wood - $20
- Metal Pipe Flanges - $8 each
- Black Iron Pipes - $6 each
- Wire Connectors - $5
- Voltage Tester - $12
- Wire Strippers - $15
Step-by-Step Instructions
⚠️ ELECTRICAL WORK WARNING
If you're not comfortable working with electricity, hire a licensed electrician. Always turn off power at the breaker before beginning.
Step 1: Prepare the Wood Backing
Cut wood to desired size (typically 6"x12"). Sand and finish (stain or paint) to match your decor.
Step 2: Assemble the Pipe Structure
- Screw pipe flange to wood backing
- Attach pipe (length depends on how far you want light to extend)
- Add elbow joint if you want downward-facing light
Step 3: Turn Off Power
At your breaker box, turn off power to the circuit where you'll install. Verify with a voltage tester at the wall location.
Step 4: Run Wiring (or Use Existing)
If there's no existing box:
- Cut hole in drywall for new electrical box
- Fish wire from nearest junction box or outlet
- This step may require electrician
Step 5: Wire the Sconce
- Connect black (hot) wires together with wire nut
- Connect white (neutral) wires together
- Connect ground wires together and to grounding screw on box
- Follow pendant light kit instructions for specifics
Step 6: Mount the Backing
Screw wood backing into electrical box or wall studs.
Step 7: Install Bulb and Shade
Add Edison bulb. Optional: Add vintage cage shade - $15
Step 8: Restore Power and Test
Turn breaker back on. Test light switch.
Pro Tips
💡 Use a dimmer switch for ambiance control: Lutron Dimmer - $25
💡 Choose LED Edison bulbs for energy efficiency and longevity
💡 Consider plug-in versions if hardwiring isn't an option
💡 Check local building codes - permits may be required
💡 Have work inspected if required in your area
Project 9: Paper Flower Wall Art
Skill Level: Beginner | Time: 4-5 hours | Budget: $15-25

Giant paper flowers create whimsical, dramatic wall installations perfect for nurseries, bedrooms, or event backdrops. This project is surprisingly simple with stunning results.
Materials Needed
- Cardstock in Various Colors - $12 (50 sheets)
- Scissors or Cutting Machine - $15
- Hot Glue Gun - $12
- Pencil - $3
- Circle Templates - $5 (or trace bowls)
- Tacks or Removable Mounting Strips - $8
Step-by-Step Instructions
Step 1: Create Petal Templates
Draw and cut out petal shapes in various sizes:
- Small: 3" tall
- Medium: 5" tall
- Large: 7" tall
Make each petal shaped like a teardrop with a flat bottom.
Step 2: Cut Petals
Trace templates onto cardstock. For one large flower, cut:
- 6 large petals
- 6 medium petals
- 6 small petals
- 1 circle base (4" diameter)
Step 3: Shape the Petals
Hold each petal at the pointed top and bottom. Gently curl the sides around a pencil to give dimension. The petal should cup slightly.
Step 4: Assemble the Flower
- Apply hot glue to flat bottom of large petals
- Attach to outer edge of circle base, overlapping slightly
- Continue with medium petals, placing them inside the large petals
- Finish with small petals in the center
Step 5: Create the Center
Cut a fringe from contrasting cardstock (3"x6", cut 1/4" strips leaving 1/2" uncut). Roll tightly and glue. This creates a textured center. Attach to middle of flower.
Step 6: Make Multiple Flowers
Create 5-7 flowers in varying sizes and colors for a full installation.
Step 7: Mount to Wall
Use removable mounting strips for easy repositioning. Start with the largest flower as your anchor, build outward.
Pro Tips
💡 Use a Cricut or Silhouette to cut petals in bulk: Cricut Explore Air 2 - $199
💡 Curl petals around a dowel for consistent curves
💡 Add leaves for more realistic look
💡 Use double-sided cardstock for color on both sides
💡 Make a mobile by hanging flowers from embroidery hoops
Project 10: Framed Fabric Art Panels
Skill Level: Beginner | Time: 1-2 hours | Budget: $30-50 per panel

Transform beautiful textiles into museum-worthy art. This technique showcases intricate fabrics—from vintage scarves to African mud cloth—without sewing a single stitch.
Materials Needed
- Frame with Mat - $20-40 (float frame or shadow box)
- Fabric - $10-20 (1/2 yard is plenty)
- Acid-Free Foam Board - $10
- Fabric Starch - $6
- Spray Adhesive - $8
- Ruler - $5
- Craft Knife - $8
Step-by-Step Instructions
Step 1: Select Your Fabric
Look for fabrics with:
- Bold patterns (geometric, botanical, abstract)
- Textural interest (embroidery, weaving)
- Color that complements your room
Great sources:
- Fat quarters from quilt shops
- Vintage scarves or handkerchiefs
- Remnant bins at fabric stores
- African mud cloth or kente cloth
- Japanese textiles
Step 2: Prepare the Mounting Board
Cut foam board to fit inside your frame's mat opening. It should be slightly smaller so the mat overlaps the edges.
Step 3: Starch the Fabric
Mix fabric starch according to package directions. Lay fabric flat, apply starch with a brush or spray. This prevents wrinkles and gives crisp edges.
Step 4: Attach Fabric to Board
- Spray adhesive on foam board
- Carefully lay fabric on top, smoothing from center outward
- Pull fabric taut but not stretched (distorts pattern)
- Wrap excess around back and glue down
Step 5: Let Dry
Place under heavy books for 1-2 hours to ensure flat adhesion.
Step 6: Frame
Place fabric-mounted board in frame. The mat should overlap fabric edges by 1/4-1/2". Secure backing.
Step 7: Hang
Hang at eye level. These look stunning in groups of 3-4 with coordinating fabrics.
Pro Tips
💡 Use a float frame for thicker textiles
💡 UV-protective glass prevents fabric fading: UV Glass
💡 Create a cohesive collection with fabrics from the same color family
💡 Change seasonally - swap fabrics for easy decor refresh
💡 Include textiles from travels for personal, meaningful art
Part 3: Furniture Makeovers (8 Projects)
Furniture makeovers are the ultimate transformation—taking forgotten, outdated pieces and giving them new life. These 8 projects range from simple paint updates to complete upholstery overhauls.
Project 11: Chalk Paint Dresser Transformation
Skill Level: Beginner | Time: 2-3 days (includes drying) | Budget: $75-120

Chalk paint revolutionized furniture refinishing by eliminating the need for sanding and priming. This project transforms a tired dresser into a shabby-chic statement piece.
Materials Needed
- Chalk Paint - $35/quart (Annie Sloan or Rust-Oleum)
- Clear Wax - $18
- Dark Wax - $18 (optional, for aged look)
- Natural Bristle Brushes - $15
- Wax Brushes - $12
- Lint-Free Cloths - $8
- Painters Pyramids - $10
- New Hardware - $20-50
Step-by-Step Instructions
Step 1: Find Your Dresser
Source from:
- Thrift stores ($20-50)
- Facebook Marketplace ($0-75)
- Family hand-me-downs (free!)
Look for solid wood construction (pressboard doesn't hold paint well). Check drawer operation—sticky drawers are hard to fix.
Step 2: Clean Thoroughly
Remove all hardware. Clean with TSP substitute - $8 or degreaser to remove oils and grime. Let dry completely.
Step 3: Minor Prep (No Sanding!)
Chalk paint adheres to most surfaces without sanding. Just:
- Fill holes if changing hardware position
- Remove loose veneer
- Lightly sand any glossy surfaces that feel slick
Step 4: Paint
- Stir paint thoroughly
- Apply with natural bristle brush in thin, even coats
- Work in sections: paint body, then drawers separately
- Don't overwork the paint—chalk paint looks better with texture
- Let dry 30 minutes between coats
- Apply 2 coats for solid coverage
Step 5: Distress (Optional)
For a shabby-chic look, sand edges and raised details with 220-grit sandpaper after paint is dry. This reveals the wood or original finish beneath, creating an authentic worn look.
Step 6: Apply Clear Wax
- Load wax brush with clear wax
- Apply in circular motions, working into the paint
- Cover entire piece evenly
- Let dry 10-15 minutes
- Buff with lint-free cloth until smooth and slightly shiny
Step 7: Apply Dark Wax (Optional)
For an antiqued look:
- Apply dark wax sparingly over clear wax
- Work into crevices and details
- Wipe excess with clean cloth immediately
- Buff to desired sheen
Step 8: Install New Hardware
Drill new holes if needed. Attach knobs or pulls. This is the jewelry of your piece—don't skimp here.
Pro Tips
💡 Water distressing: Instead of sanding, wipe edges with damp cloth while paint is still slightly tacky
💡 Protect the top: Use polycrylic - $15 on dresser tops for extra durability
💡 Paint inside drawers: Use a contrasting color for a surprise pop when opened
💡 Label drawers: Take a photo of hardware placement before removing
Project 12: Vintage Chair Reupholstery
Skill Level: Intermediate | Time: 6-10 hours | Budget: $80-150

Reupholstering transforms dated chairs into custom pieces. This project focuses on a simple dining or side chair—perfect for building skills before tackling larger pieces.
Materials Needed
- Upholstery Fabric - $40-80 (2-3 yards depending on chair)
- High-Density Foam - $25 (if replacing cushion)
- Staple Gun - $25
- Staples - $8
- Pliers - $15
- Screwdriver - $20
- Fabric Scissors - $18
- Upholstery Tacks - $10 (optional decorative trim)
Step-by-Step Instructions
Step 1: Choose the Right Chair
Beginner-friendly features:
- Removable seat (screwed on, not nailed)
- Simple shape (no tufting, no arms)
- Good bones (solid frame, not wobbly)
Step 2: Document Everything
Take photos from every angle before disassembling. You'll reference these during reassembly.
Step 3: Remove Old Upholstery
- Flip chair upside down
- Remove screws holding seat base
- Use pliers to remove staples from underside
- Carefully peel away old fabric, noting order of layers
- Save pieces to use as templates
Step 4: Assess and Replace Padding
If foam is compressed or crumbling:
- Trace old foam onto new foam
- Cut with electric knife or serrated bread knife
- Attach to seat base with spray adhesive
Step 5: Cut New Fabric
- Lay old fabric pieces on new fabric as templates
- Add 4" extra on all sides for pulling
- Mark with chalk or fabric pen
- Cut carefully with sharp scissors
Step 6: Upholster the Seat
- Center fabric over foam
- Start at center front, pull taut, staple
- Move to center back, pull taut, staple
- Repeat on sides
- Work from center toward corners
- Pull firmly but don't overstretch—fabric relaxes over time
Step 7: Handle the Corners
- For square corners: Fold like wrapping a present, staple underneath
- For rounded corners: Make small pleats, distributing fabric evenly
Step 8: Trim and Finish
- Trim excess fabric, leaving 1" beyond staples
- Add dust cover fabric to underside for professional look: Cambric Dust Cover - $8
- Reattach seat to chair frame with screws
Pro Tips
💡 Pattern matching matters - Center patterns on the seat for best look
💡 Buy extra fabric - Mistakes happen, and patterns vary between dye lots
💡 Use a pneumatic stapler for large projects: Pneumatic Stapler - $65
💡 Steam the fabric before cutting—removes wrinkles and preshrinks
💡 Check fabric durability - Look for double rub count (15,000+ for residential use)
Project 13: Styled Bookshelf Transformation
Skill Level: Beginner | Time: 2-4 hours | Budget: $50-100

A bookshelf makeover combines paint, styling, and organization to transform a basic storage piece into a stunning display. This is the easiest furniture upgrade with dramatic results.
Materials Needed
- Paint or Stain - $30 (for backing or entire piece)
- Contact Paper or Wallpaper - $15 (backing alternative)
- Bookends - $20
- Decorative Objects - varies
- Storage Baskets - $15-30
Step-by-Step Instructions
Step 1: Prep the Bookshelf
- Empty completely
- Clean all surfaces
- If painting, remove shelves if possible
- Lightly sand glossy surfaces
Step 2: Transform the Backing (Choose One Method)
Paint Method:
- Tape off shelves and sides
- Paint backing a bold color (navy, emerald, charcoal)
- Or paint just the inside edges for subtle definition
Wallpaper/Contact Paper Method:
- Cut pieces to fit backing of each shelf section
- Apply carefully, smoothing bubbles
- Peel-and-stick wallpaper - $25 is easiest
Step 3: Paint Exterior (Optional)
If the bookshelf finish is dated:
- Prime if going light over dark
- Apply 2 coats of paint in your chosen color
- Let dry completely between coats
Step 4: Reassemble
Replace shelves. Adjust heights for items you plan to display.
Step 5: The Art of Styling
The Rule of Thirds:
- 1/3 books (vertically and stacked horizontally)
- 1/3 decorative objects (vases, sculptures, candles)
- 1/3 empty space (breathing room is crucial)
Color Coordination:
- Arrange books by color for rainbow effect
- Or organize by subject for functional look
- Wrap some books in kraft paper for neutral base
Height Variation:
- Place tall items on ends, working toward shorter in center
- Or alternate tall and short by shelf
- Use horizontal book stacks to vary height
Layering:
- Place art or framed photos leaning against the back
- Layer smaller objects in front
- Create depth with varied distances from the edge
Baskets on Bottom:
- Use woven baskets on lower shelves for hidden storage
- Label with brass tag labels - $12
Pro Tips
💡 Remove dust jackets from hardcovers for cohesive color
💡 Add picture lights for gallery feel: LED Picture Light - $35
💡 Rotate seasonally - keep styling fresh
💡 Use odd numbers of objects per shelf (3, 5, 7)
💡 Step back frequently - assess from across the room
Project 14: Side Table Makeover with Tile Top
Skill Level: Intermediate | Time: 1-2 days | Budget: $60-100

Transform a basic side table into a custom piece with a tile top. This project combines woodworking and tiling skills for a durable, beautiful result.
Materials Needed
- End Table - $20-40 (thrifted or inexpensive)
- Ceramic or Porcelain Tiles - $30-50
- Thinset Mortar - $15
- Grout - $12
- Notched Trowel - $8
- Grout Float - $10
- Tile Spacers - $5
- Tile Cutter - $25 (or rent)
- Grout Sealer - $12
Step-by-Step Instructions
Step 1: Select Your Table
Ideal candidates:
- Solid wood or MDF construction
- Flat, stable surface
- Simple design (Mission style, mid-century, basic square)
- Avoid: veneer that might peel, wobbly legs
Step 2: Prepare the Surface
- Remove existing finish from top (sand or strip)
- Clean thoroughly
- If top is uneven, add 1/4" plywood layer, cut to size
Step 3: Plan Your Tile Layout
- Dry fit tiles on the table top
- Determine pattern: straight grid, brick, herringbone
- Measure and mark center point
- Plan cuts needed for edges
Step 4: Cut Tiles (if needed)
Mark tiles with pencil. Use a tile cutter for straight cuts:
- Score tile firmly
- Press down to snap along score line
- Smooth edges with tile file - $6
Step 5: Apply Thinset
- Mix thinset according to package directions
- Apply to table top with notched trowel at 45-degree angle
- Work in sections so thinset doesn't dry
Step 6: Set Tiles
- Press tiles firmly into thinset
- Use spacers to maintain even gaps (typically 1/8" or 1/4")
- Check level frequently—tiles should be flat and even
- Wipe excess thinset immediately
Step 7: Let Set
Wait 24 hours for thinset to cure completely.
Step 8: Apply Grout
- Mix grout to consistency of peanut butter
- Spread across tiles with grout float, pressing into gaps
- Work diagonally across tiles
- Remove excess with float held at 45-degree angle
Step 9: Clean Tiles
- Wait 15-30 minutes for grout to firm up
- Wipe tiles with damp sponge, rinsing frequently
- Don't remove grout from gaps—just clean surface
- Polish with dry cloth once haze appears
Step 10: Seal and Finish
- Wait 72 hours for grout to fully cure
- Apply grout sealer with small brush or applicator bottle
- Paint or stain table base to complement tile
Pro Tips
💡 Use self-leveling spacers for consistent grout lines
💡 Choose rectified tiles (precisely cut) for minimal grout lines
💡 Large format tiles (12x24") make the project faster
💡 Test grout color on a sample board first—dries lighter
💡 Add felt pads to bottom of legs to protect floors
Project 15: DIY Upholstered Headboard
Skill Level: Intermediate | Time: 4-6 hours | Budget: $150-250

An upholstered headboard adds luxury and comfort to any bedroom. This project creates a professional-looking piece at a fraction of retail cost (typically $500-1500+).
Materials Needed
- Plywood - $30 (1/2" thick, cut to size)
- 2x4 Lumber - $15 (for legs/mounting)
- Upholstery Foam - $50 (3-4" thick)
- Batting - $15
- Upholstery Fabric - $60-100 (4-5 yards)
- Spray Adhesive - $8
- Staple Gun - $25
- Heavy-Duty Staples - $10
- Electric Knife - $18 (optional, for cutting foam)
Step-by-Step Instructions
Step 1: Determine Size
Standard sizes:
- Twin: 38" x 30" high
- Full: 54" x 30" high
- Queen: 60" x 30" high
- King: 76" x 30" high
- California King: 72" x 30" high
Height can vary from 24" (minimalist) to 60" (dramatic floor-to-ceiling).
Step 2: Cut Plywood Base
Have plywood cut at hardware store, or use circular saw. Cut 2x4 legs (24" long) to attach to back for mounting.
Step 3: Attach Legs
- Position legs flush with sides of plywood, extending down 12-18" below headboard bottom
- Screw through plywood into 2x4s with 2" wood screws
- These legs slide between mattress and box spring for support
Step 4: Cut and Attach Foam
- Cut foam to match plywood dimensions (electric knife works best)
- Spray plywood with adhesive
- Press foam firmly in place
- Let adhesive set 10 minutes
Step 5: Add Batting
- Lay batting on floor, smooth side down
- Place foam-covered plywood on top, foam side down
- Wrap batting around to back
- Staple to plywood, pulling taut
- Trim excess
Step 6: Upholster with Fabric
- Lay fabric face down on floor
- Place headboard on top, batting side down
- Start at center top: pull fabric taut, staple
- Move to center bottom: pull taut, staple
- Repeat on sides
- Work toward corners, pulling and stapling every 2-3 inches
Step 7: Handle Corners
- Pull fabric to center of corner edge, staple
- Fold one side over, creating a neat diagonal fold
- Fold other side over, overlapping slightly
- Staple securely
- Repeat all four corners
Step 8: Add Tufting (Optional)
For a tufted look:
- Mark diamond pattern on front with chalk
- Drill holes through plywood at marks
- Thread upholstery needle with twine
- Sew through foam and fabric, securing button at front
- Pull tight, staple twine to back of plywood
- This creates the classic diamond tufting
Step 9: Mount the Headboard
- Slide legs between mattress and box spring
- The mattress weight holds it in place
- For extra security, attach to wall studs with L-brackets - $8
Pro Tips
💡 Order fabric samples - Colors look different in person vs. screen
💡 Add a backing fabric for clean, professional look: Cambric
💡 Use outdoor fabric for durability and stain resistance
💡 Make it wider than mattress by 3" on each side for luxe look
💡 Add nailhead trim for detail: Nailhead Trim Kit - $15
Project 16: Storage Ottoman from Wooden Crate
Skill Level: Beginner | Time: 3-4 hours | Budget: $40-70

A storage ottoman provides seating, footrest, and hidden storage—triple functionality in one DIY project. This version uses a wooden crate for easy construction.
Materials Needed
- Wooden Crate - $20-30 (wine crate or new)
- Plywood - $15 (for lid)
- 2" Upholstery Foam - $20
- Fabric - $20 (1 yard)
- Caster Wheels - $15 (4 pack with brakes)
- Hinges - $8
- Staple Gun - $25
- Paint or Stain - $15
Step-by-Step Instructions
Step 1: Source Your Crate
Options:
- Wine crates from liquor stores (often free or $5-10)
- New craft crates: Wooden Crate
- Vintage crates from flea markets ($15-30)
Ensure crate is sturdy and clean.
Step 2: Prep the Crate
- Sand any rough edges
- Fill gaps or cracks with wood filler if needed
- Paint or stain exterior and interior
- Let dry completely
Step 3: Create the Lid
- Cut plywood to fit over crate opening with 1/2" overhang
- Cut foam to same size as plywood
- Spray adhesive on plywood, attach foam
- Upholster with fabric following headboard instructions (Steps 5-7)
- This creates a padded, hinged seat
Step 4: Attach Hinges
- Position lid on crate
- Attach hinges at back, inside the crate
- Ensure lid opens smoothly and stays open (use lid support hinge - $12 for safety)
Step 5: Add Casters
- Turn crate upside down
- Position casters at corners
- Pre-drill holes to prevent splitting
- Attach with screws
- Use casters with brakes to prevent rolling when sitting
Step 6: Add Interior Details (Optional)
- Line interior with fabric for finished look
- Add dividers for organizing: Wood Dividers - $10
- Include a small tray on top for remotes, coasters
Pro Tips
💡 Add a handle to the front of the lid for easy opening
💡 Use outdoor fabric if ottoman will see heavy use
💡 Make multiple and push together for a coffee table alternative
💡 Add a tray on top to create a stable surface for drinks
💡 Child safety: Use soft-close hinges to prevent slammed fingers
Project 17: Bar Cart Transformation
Skill Level: Beginner | Time: 4-6 hours | Budget: $80-150

A vintage bar cart brings Mad Men sophistication to your entertaining. Transform a dated tea cart, rolling cart, or even a small shelving unit into a stylish home bar.
Materials Needed
- Vintage Cart - $30-80 (thrifted)
- Spray Paint - $15 (metallic or bold color)
- Marble Contact Paper - $12 (for faux marble top)
- Glass Racks - $20 (under-shelf stemware holders)
- Bar Tools - $30
- Decanter Set - $40 (optional)
Step-by-Step Instructions
Step 1: Find Your Cart
Look for:
- Metal or wood construction with wheels
- Two tiers minimum
- Sturdy frame (not wobbly)
- Vintage charm: brass, gold, or interesting lines
Search: thrift stores, estate sales, Facebook Marketplace
Step 2: Clean and Prep
- Remove all hardware (wheels, handles)
- Clean with degreaser
- Sand any rust spots or glossy surfaces
- Wipe down with tack cloth
Step 3: Paint
- Apply primer if going light over dark
- Spray paint in thin, even coats
- Metallic options: brass, gold, matte black, copper
- Bold options: emerald, navy, coral
- Apply 2-3 light coats, letting dry between each
Step 4: Transform the Top Surface
For a luxe marble look on a budget:
- Clean surface thoroughly
- Cut marble contact paper to size
- Apply slowly, smoothing bubbles with squeegee
- Trim edges with craft knife
- Alternative: peel-and-stick tile - $20
Step 5: Replace Hardware
- Clean original wheels or replace with new: Vintage-Style Casters - $20
- Add new handles if desired
- Spray paint original hardware to match cart
Step 6: Add Storage Accessories
- Install under-shelf glass racks - $20 for stemware storage
- Add basket or tray - $15 for bottle organization
- Include ice bucket - $25 and cocktail shaker - $15
Step 7: Style Your Cart
Essential Bar Cart Styling Formula:
- Top tier: Spirits (3-4 bottles), cocktail shaker, ice bucket
- Bottom tier: Glasses (mix of types), mixers, bar tools
- Side: Cocktail recipe book, small plant or candle
Color Coordination:
- Arrange bottles by height, tallest in back
- Group similar colors together
- Add metallics (copper mugs, gold tools) for warmth
Pro Tips
💡 Add LED strip lights underneath for dramatic effect: LED Strip - $18
💡 Include a small cutting board and knife for garnishes
💡 Label bottles with chalkboard labels - $8 for home-infused spirits
💡 Seasonal styling: Change accessories for holidays
💡 Keep it functional: Leave room to actually make drinks!
Project 18: Storage Bench with Built-in Cubbies
Skill Level: Advanced | Time: 2-3 days | Budget: $200-350

A storage bench combines seating with organization—perfect for entryways, mudrooms, or at the foot of a bed. This built-in style project requires woodworking skills but delivers professional results.
Materials Needed
- Plywood - $60 (3/4" for structure, 1/4" for backing)
- 2x4 Lumber - $30 (for frame)
- Wood Screws - $15
- Wood Glue - $8
- Wood Filler - $6
- Sandpaper - $10
- Paint or Stain - $30
- Piano Hinge - $15
- Upholstery Foam - $40
- Fabric - $40 (2 yards)
Step-by-Step Instructions
Step 1: Design Your Bench
Determine dimensions based on your space:
- Standard height: 18-20"
- Standard depth: 16-20"
- Length: Custom to your space (common: 48-72")
- Cubby size: 12-15" wide each
Step 2: Build the Base Frame
- Cut 2x4s for front, back, and sides
- Assemble rectangular frame with screws and wood glue
- Add center dividers for cubbies (vertical 2x4s)
- Check for square with carpenter's square
Step 3: Add Plywood Skin
- Cut 3/4" plywood for sides, front, and top seat frame
- Attach to 2x4 frame with screws and glue
- Cut 1/4" plywood for backing (nailed on)
- This creates the box structure with open cubbies
Step 4: Build the Seat Lid
- Cut 3/4" plywood to create hinged lid(s)
- If bench is long, make 2-3 separate lids for easier opening
- Frame edges with 1x2 trim for finished look
Step 5: Sand and Finish
- Fill all screw holes with wood filler
- Sand entire piece, starting with 120-grit, finishing with 220-grit
- Apply primer if painting
- Apply 2 coats paint or stain
- Seal with polyurethane for durability
Step 6: Install Hinges
- Position seat lid on bench
- Attach piano hinge along back edge
- Test opening and closing
- Add soft-close hinges - $20 for safety
Step 7: Upholster Seat Cushion
- Cut foam to fit seat lid
- Upholster following headboard instructions
- Attach cushion to lid with Velcro for easy removal
Step 8: Add Finishing Touches
- Basket inserts - $30 for cubbies (set of 3-4)
- Coat hooks - $15 above bench
- Shoe tray - $12 underneath
Pro Tips
💡 Build in sections if transporting up stairs
💡 Use pocket holes for invisible joinery: Kreg Jig - $40
💡 Add ventilation holes inside storage area if storing shoes
💡 Level the bench - shim legs if floor is uneven
💡 Anchor to wall if you have children (tip-over safety)
Part 4: Textile Projects (6 Projects)
Textiles soften a space, add color and pattern, and create cozy atmosphere. These 6 projects require minimal sewing (or none at all) and deliver high-impact results.
Project 19: No-Sew Drop Cloth Curtains
Skill Level: Beginner | Time: 2-3 hours | Budget: $30-60 per panel

Custom curtains typically cost $100-300 per panel. These DIY drop cloth curtains look like high-end linen at a fraction of the price—and require zero sewing.
Materials Needed
- Canvas Drop Cloth - $15-25 (9x12' covers 2 panels)
- Curtain Clip Rings - $15 (set of 14)
- Curtain Rod - $20-40
- Fabric Scissors - $18
- Iron - $25
- Stitch Witchery - $8 (iron-on adhesive)
Step-by-Step Instructions
Step 1: Measure Your Windows
- Width: Measure window width x 2-2.5 for fullness
- Length: Measure from rod to floor, add 4" for hems
- Rod placement: Mount 6-12" above window frame, extend 6-10" beyond window width
Step 2: Prepare Drop Cloth
- Wash and dry drop cloth 2-3 times to soften and pre-shrink
- The more you wash, the more linen-like it becomes
- Iron while slightly damp for best results
Step 3: Cut Panels
- Lay drop cloth flat
- Measure and mark panel dimensions
- Cut with sharp fabric scissors
- One 9x12' drop cloth = two 54" x 96" panels (standard size)
Step 4: Create Hem (No-Sew Method)
- Fold bottom edge up 4", press with iron
- Fold again to create 2" double hem, press
- Slip Stitch Witchery into fold
- Iron according to package directions (high heat, steam)
- The adhesive creates a permanent bond
Step 5: Create Rod Pocket or Header
Option A - Clip Rings (Easiest):
- Fold top edge down 1", press
- Attach clip rings every 4-5 inches
- Hang directly on rod
Option B - Rod Pocket:
- Fold top down 4", press
- Fold again for 2" pocket, press
- Apply Stitch Witchery
- Iron to seal
Step 6: Side Hems (Optional)
If edges look too rough:
- Fold side edges 1", press
- Fold again, apply Stitch Witchery
- Iron to seal
Step 7: Hang
- Mount rod at desired height
- Hang curtains
- Adjust to create even folds
Pro Tips
💡 Add blackout lining by attaching with clips behind: Blackout Liner - $20
💡 Dye the drop cloth for custom colors: Rit Dye
💡 Add trim along leading edge: Pom Pom Trim - $8
💡 Steam wrinkles out once hung rather than ironing entire panel
💡 Add weights to hem corners for better drape: Curtain Weights - $6
Project 20: Hand-Dyed Pillow Covers
Skill Level: Beginner | Time: 4-6 hours + drying | Budget: $25-40 per pillow

Custom-dyed pillows bring artistic, one-of-a-kind beauty to your sofa or bed. Shibori (Japanese tie-dye) and ice-dye techniques create stunning patterns that can't be replicated.
Materials Needed
- Cotton Pillow Covers - $12 (2 pack, natural/white)
- Fiber Reactive Dye - $8 (Procion MX)
- Soda Ash Fixative - $6
- Rubber Bands - $3
- Plastic Squirt Bottles - $5
- Plastic Drop Cloth - $6
- Wire Rack - $15 (for ice dyeing)
- Ice Cubes - $5 bags (for ice dyeing)
Technique A: Shibori (Tie-Dye) Method
Step 1: Prep the Fabric
- Wash pillow covers to remove sizing
- Mix soda ash with water (1 cup per gallon)
- Soak fabric for 15 minutes
- Wring out excess (wear gloves)
Step 2: Create Pattern
Spiral Pattern:
- Lay fabric flat
- Pinch center and twist entire fabric into spiral
- Secure with rubber bands crossing at center (like pizza slices)
Stripes:
- Accordion fold fabric
- Secure with rubber bands every 2-3 inches
Circles:
- Pinch small sections of fabric
- Wrap tightly with rubber bands
Step 3: Apply Dye
- Mix dye according to package directions
- Apply colors to different sections created by rubber bands
- Or use single color for classic look
- Flip and dye other side
Step 4: Set the Dye
- Place in plastic bag or wrap in plastic
- Let sit 6-24 hours (longer = more vibrant)
Step 5: Rinse
- Wearing gloves, rinse in cold water until water runs clear
- Remove rubber bands
- Wash in hot water with mild detergent
- Dry separately
Technique B: Ice Dyeing Method
Step 1: Prep
- Soak fabric in soda ash solution
- Wring out and scrunch fabric on wire rack
- Place rack in large plastic tub
Step 2: Apply Ice
- Cover fabric completely with ice cubes
- The ice creates organic, watercolor-like patterns
Step 3: Add Dye
- Sprinkle dye powder directly over ice
- Use 1-2 colors for best results
- The melting ice carries dye through fabric unpredictably
Step 4: Let Process
- Wait for all ice to melt (4-6 hours)
- Let sit additional 12-24 hours
Step 5: Rinse and Wash
- Rinse until water runs clear
- Wash and dry
Pro Tips
💡 Protect surfaces - Dye stains permanently
💡 Wear old clothes and rubber gloves throughout
💡 Mix colors on test fabric first to preview results
💡 Use more dye than you think - fabric absorbs more than expected
💡 Natural fibers only - cotton, linen, rayon. No polyester.
Project 21: Chunky Woven Throw Blanket
Skill Level: Intermediate | Time: 8-12 hours | Budget: $60-100

A hand-woven throw blanket is the ultimate cozy luxury. Using a simple frame loom, you'll create a textured, substantial piece that becomes an heirloom.
Materials Needed
- Frame Loom - $45 (20x24" minimum)
- Chunky Yarn - $40-60 (300-400 yards total)
- Cotton Warp Thread - $8
- Weaving Needle - $8
- Shuttle - $6
- Comb or Fork - $5 (for beating weft)
Step-by-Step Instructions
Step 1: Warp the Loom
- Tie warp thread to bottom left corner of loom
- Wrap vertically up and around top peg, back down around bottom peg
- Continue across loom, maintaining even tension
- For a 20" wide throw, create 40 warp threads (2 per inch)
- Tie off at bottom right
Step 2: Prepare Weft Yarn
- Cut yarn into arm-length pieces for easier handling
- Choose 3-5 colors/textures for variety
- Plan a general pattern (stripes, color blocks, random)
Step 3: Begin Weaving
- Thread yarn through weaving needle
- Starting at bottom, go over-under-over-under across warp threads
- Use comb to push (beat) weft firmly against previous row
- Next row: go under-over-under-over (opposite pattern)
Step 4: Create Texture
- Tabby weave: Plain over-under (dense, sturdy)
- Soumak: Wrap around 2 warp threads (braided texture)
- Pile/weft floats: Let yarn loop above surface (bubbly texture)
- Rya knots: Cut yarn, tie around warps (shag texture)
Step 5: Change Colors
- When switching colors, leave 4" tails
- Weave tails back into work later
- For stripes, weave 4-8 rows per color
Step 6: Build Length
- Continue weaving until piece measures 50-60" long
- As you weave, roll finished section onto the loom's cloth beam
- Maintain consistent beat pressure for even texture
Step 7: Finish the Edges
- For fringe: Cut warp threads in groups of 4, tie overhand knots
- For hemstitch: Use needle to sew groups of warp threads together
Step 8: Remove from Loom
- Cut warp threads from loom
- Tie fringe knots if not hemstitched
- Weave in all loose ends with needle
Step 9: Block (Optional)
- Soak blanket in cool water with mild soap
- Gently squeeze out water
- Lay flat to dry, shaping to even rectangle
Pro Tips
💡 Use a variety of textures - chunky wool, roving, ribbon yarn
💡 Add found objects - strips of fabric, twigs, shells
💡 Beat loosely for drape, firmly for structure
💡 Make matching pillows with leftover yarn
💡 Record your pattern if you want to replicate
Project 22: Woven Table Runner
Skill Level: Intermediate | Time: 6-8 hours | Budget: $40-60

A hand-woven table runner elevates everyday dining and becomes a cherished piece for special occasions. This narrower project is perfect for learning weaving techniques.
Materials Needed
- Rigid Heddle Loom - $120 (or use frame loom from Project 21)
- Cotton or Linen Yarn - $30-40
- Warp Thread - $8
- Dowel or Hanging Rod - $5 (for display/storage)
Step-by-Step Instructions
Step 1: Calculate Dimensions
Standard table runner: 14-16" wide x 72-90" long
Add 20% for shrinkage and take-up
Step 2: Warp the Loom
- Measure warp: desired length x 2, plus 2 yards for loom waste
- For 16" width at 8 threads per inch = 128 warp threads
- Dress loom following manufacturer's instructions
- Maintain even, firm tension
Step 3: Wind Bobbins/Shuttles
- Wind weft yarn onto shuttles or bobbins
- Having multiple shuttles ready speeds weaving
Step 4: Weave Header
- Weave 1" with scrap yarn or warp thread
- This stabilizes the edge and spaces warp evenly
Step 5: Begin Pattern Weaving
Simple Stripes:
- Alternate 2 rows Color A, 2 rows Color B
- Or create graduated stripes: 2 rows, 4 rows, 6 rows, 4 rows, 2 rows
Plaid/Check:
- Stripe warp in groups: 8 threads Color A, 8 threads Color B
- Match weft stripes to warp stripes
- Creates plaid pattern
Hemstitch Border:
- At beginning and end, leave 2" unwoven
- Use needle to create hemstitch: group 4 warp threads, loop weft around
- This prevents unraveling
Step 6: Maintain Consistency
- Use temple (stretcher) if available to maintain width
- Measure frequently to ensure consistent width
- Beat with same pressure throughout
Step 7: Finish
- Weave final 1" with scrap yarn (header)
- Cut from loom
- Hemstitch end if not already done
- Hand wash gently, lay flat to dry
- Press with steam iron
Pro Tips
💡 Use contrasting warp and weft for textured look
💡 Add metallic thread for holiday sparkle
💡 Fringe both ends or sew hems for clean finish
💡 Match napkins by weaving matching fabric
💡 Make seasonal sets - pastels for spring, warm tones for fall
Project 23: Floor Pouf
Skill Level: Intermediate | Time: 5-7 hours | Budget: $50-80

A floor pouf serves as extra seating, footrest, or side table. This versatile piece adds bohemian style and functionality to living spaces.
Materials Needed
- Heavyweight Fabric - $30-50 (2-3 yards, canvas or upholstery weight)
- Filler - $20-30 (bean bag filler, foam scraps, or old clothes)
- Sewing Machine - $140 (or hand sew)
- Heavy-Duty Thread - $5
- Zipper - $5 (22" invisible zipper)
- Fabric Scissors - $18
- Straight Pins - $4
Step-by-Step Instructions
Step 1: Create Pattern
Decide size: 18-24" diameter, 12-16" height
Step 2: Cut Pieces
For Cylindrical Pouf:
- Top and bottom circles: Cut 2, diameter + 1" seam allowance
- Side panel: Rectangle, (diameter x π) + 1" by height + 1"
- Example: 20" diameter x 14" height
- Circles: 21" diameter
- Side: 63" x 15"
For Cube Pouf:
- Cut 6 squares: size + 1" (e.g., 18" pouf = 19" squares)
Step 3: Sew Side Panel
- Fold side panel right sides together
- Sew short ends together, creating a tube
- Press seam open
Step 4: Attach Top
- Pin top circle to side panel, right sides together
- Ease fabric around curve—use lots of pins
- Sew slowly, adjusting as you go
- Go slow - curves are tricky
Step 5: Attach Bottom (Leave Opening)
- Sew zipper into one side of bottom panel first
- Pin and sew bottom to side panel, leaving zipper open
- This creates a removable cover for washing
Step 6: Make Inner Liner (Optional)
- Repeat steps 3-5 with inexpensive fabric (muslin or old sheets)
- This holds filler, keeping outer cover clean
- Skip zipper—just sew closed after filling
Step 7: Fill
- Turn cover right side out
- Insert liner if using
- Fill with bean bag filler, foam scraps, or tightly packed old clothes
- Fill firmly—poufs soften with use
Step 8: Close
- Zip closed
- Fluff into shape
Pro Tips
💡 Use outdoor fabric for durability and stain resistance
💡 Add a handle on top for easy moving
💡 Make multiple sizes for nesting set
💡 Add embroidery or appliqué for custom designs
💡 Use a funnel to fill with bean bag filler (messy otherwise!)
Project 24: Rope Coil Basket
Skill Level: Beginner | Time: 3-4 hours | Budget: $25-35

A rope coil basket brings organic texture and storage to any room. This beginner-friendly project requires only rope, thread, and a sewing machine.
Materials Needed
- Cotton Clothesline Rope - $15 (100 feet, 3/8" diameter)
- Sewing Machine - $140
- Heavy-Duty Thread - $5
- Fabric Scraps - $5 (optional, for wrapped sections)
- Fabric Glue - $6 (optional)
Step-by-Step Instructions
Step 1: Prepare Machine
- Use zigzag stitch, width 4-5mm, length 2-3mm
- Use heavy-duty needle (size 16 or 18)
- Use heavy-duty or upholstery thread
Step 2: Start the Base
- Cut rope end at an angle
- Coil rope tightly, end to end, for 3" diameter
- Hold with clips if needed
- Zigzag stitch through center of rope coil, securing layers together
- Stitch around and around, keeping rope tight
Step 3: Continue Coiling
- As base reaches desired diameter (typically 8-10"), start angling rope upward
- Tilt basket gradually as you sew, creating sides
- Continue stitching, attaching new rope to previous coil
Step 4: Add Fabric Accents (Optional)
For color and pattern:
- Cut fabric strips 1" wide
- Wrap around rope sections
- Tuck ends in and sew over
- Alternate wrapped and plain sections
Step 5: Shape the Basket
- For straight sides: maintain consistent angle
- For flared sides: angle rope outward
- For curved/bowl shape: change angle gradually
Step 6: Finish the Top
- When desired height is reached, cut rope
- Tuck end under last coil
- Stitch securely, backstitching several times
- Trim thread
Step 7: Optional Handles
- Cut 12" rope pieces
- Fold in half, stitch ends to basket sides
- Or create integrated handles by skipping stitching sections during coiling
Pro Tips
💡 Use contrasting thread for visible zigzag detail
💡 Keep tension even - loose coils create gaps
💡 Go slow - rushing causes rope to slip
💡 Use poly rope for outdoor baskets
💡 Make sets of nesting sizes for gift giving
Part 5: Small Decor Projects (6 Projects)
These smaller projects are perfect for beginners, quick weekend crafts, or thoughtful handmade gifts. Each adds personality and handmade charm to your space.
Project 25: Terrarium
Skill Level: Beginner | Time: 1-2 hours | Budget: $30-50

A terrarium brings living greenery indoors in a self-contained ecosystem. These miniature gardens are surprisingly low-maintenance and endlessly customizable.
Materials Needed
- Glass Container - $15-30 (with or without lid)
- Succulents - $20 (3-5 small plants)
- Cactus/Succulent Soil - $8
- Gravel or Pebbles - $5
- Activated Charcoal - $6
- Sphagnum Moss - $5
- Decorative Elements - varies (stones, driftwood, figurines)
- Long Tweezers - $8 (helpful for arranging)
Step-by-Step Instructions
Step 1: Select Your Container
Options:
- Open terrarium: Bowl, vase, apothecary jar (for succulents, cacti)
- Closed terrarium: Jar with lid, cloche (for ferns, moss)
Step 2: Create Drainage Layer
- Add 1-2" gravel or pebbles to bottom
- This prevents root rot by allowing excess water to drain
Step 3: Add Charcoal
- Sprinkle thin layer of activated charcoal over gravel
- This keeps soil fresh and prevents odors (especially important in closed terrariums)
Step 4: Add Moss Barrier
- Lay sphagnum moss over charcoal
- This prevents soil from mixing into drainage layer
Step 5: Add Soil
- Add 2-3" of cactus/succulent soil
- Create small hills and valleys for visual interest
Step 6: Plant Arrangement
- Plan placement before planting—tallest in back or center
- Remove plants from pots, gently loosen roots
- Dig small holes in soil
- Place plants, firming soil around roots
- Use tweezers for precise placement
Step 7: Add Hardscape
- Arrange decorative stones, driftwood, shells
- Create pathways, seating areas, or natural features
- Press items firmly into soil
Step 8: Initial Watering
- Lightly mist soil until slightly moist
- For succulents: less is more—they'll rot in wet soil
- For closed terrariums: moisten thoroughly, then seal
Step 9: Care
- Light: Bright, indirect light
- Water: Succulents every 2-3 weeks; closed terrariums rarely need watering
- Pruning: Trim plants to maintain shape and size
Pro Tips
💡 Choose plants with similar water needs
💡 Use a brush to clean soil from leaves and glass
💡 Add LED grow lights if natural light is limited: Grow Light - $25
💡 Make it personal - add miniature items that tell a story
💡 Group in odd numbers - 3 or 5 plants looks best
Project 26: Soy Candle Making
Skill Level: Beginner | Time: 2-3 hours + curing | Budget: $40-60 (makes 6-8 candles)

Hand-poured candles make perfect gifts and add ambiance to your home. Soy wax burns cleaner and longer than paraffin, and you control the scent and style.
Materials Needed
- Soy Wax Flakes - $20 (2 lbs)
- Candle Jars - $15 (6-8 containers)
- Candle Wicks - $8 (with tabs)
- Fragrance Oil - $10 (1 oz scents 1 lb wax)
- Wick Holders/Centering Devices - $6
- Pouring Pot - $12
- Thermometer - $8
- Digital Scale - $15
Step-by-Step Instructions
Step 1: Prepare Workspace
- Cover work surface with newspaper or cardboard
- Have all materials within reach
- Ensure good ventilation
Step 2: Prepare Containers
- Clean and dry jars completely
- Use a wick sticker - $5 or hot glue to attach wick tab to bottom center of jar
- Use wick holder to keep wick centered and upright
Step 3: Measure Wax
- Fill jar with wax flakes to desired level
- Pour into pouring pot—this is your measurement
- Double this amount (wax shrinks as it melts)
- Weigh wax for accuracy
Step 4: Melt Wax
- Create double boiler: place pouring pot in saucepan with 1" water
- Heat over medium heat
- Stir occasionally
- Heat to 185°F (use thermometer)
Step 5: Add Fragrance
- Remove from heat
- Let cool to 135°F
- Add fragrance oil: 1 oz per pound of wax for strong scent
- Stir gently for 2 minutes
Step 6: Pour
- Let wax cool to 125°F (prevents sinking/sweating)
- Pour slowly into prepared jar
- Leave 1/2" headspace at top
- Save a small amount of wax for topping off later
Step 7: Secure Wick
- Ensure wick stays centered
- Wrap excess wick around pencil or holder, resting on jar rim
- This keeps wick straight while cooling
Step 8: Cool
- Let cool undisturbed at room temperature
- As wax cools, it may sink in the center
- Reheat reserved wax and top off any sinkholes
Step 9: Cure
- Let candles cure 3-7 days before burning
- This allows fragrance to fully bind with wax
- Trim wick to 1/4" before first burn
Step 10: Label (Optional)
- Create custom labels with kraft paper and twine
- Include scent name and burn instructions
Pro Tips
💡 First burn is crucial - let wax melt to edges (prevents tunneling)
💡 Use wick trimmers for clean cuts: Wick Trimmer - $10
💡 Add color with candle dye - $8
💡 Re-use containers - freeze to remove old wax, clean, repour
💡 Soy wax has memory - always burn to edges for even future burns
Project 27: Concrete Planters
Skill Level: Intermediate | Time: 2-3 days (includes curing) | Budget: $30-50

Concrete planters bring industrial, modern style to indoor and outdoor spaces. This project teaches you to cast custom vessels in various shapes and sizes.
Materials Needed
- Quick-Setting Concrete Mix - $12
- Plastic Containers - $5 (for molds, various sizes)
- Cooking Spray - $4
- Sandpaper - $8
- Concrete Sealer - $15
- Rubber Gloves - $8
- Dust Mask - $12
- Bucket - $5
- Stir Stick - $3
Step-by-Step Instructions
Step 1: Prepare Molds
- Find two nesting containers (one fits inside the other with 1-2" gap)
- Examples: plastic cups, yogurt containers, buckets
- Spray interior of outer mold and exterior of inner mold with cooking spray
Step 2: Mix Concrete
- Wear mask and gloves
- Mix concrete per package directions in bucket
- Aim for thick milkshake consistency
Step 3: Pour Outer Layer
- Pour concrete into outer mold, filling 1/3 full
- Tap sides to remove air bubbles
- Press inner mold into center
- The concrete will rise up the sides, creating walls
Step 4: Weight the Inner Mold
- Place rocks or weights in inner mold to keep it submerged
- Ensure even spacing on all sides for uniform walls
Step 5: Tap and Settle
- Tap exterior mold firmly on work surface
- This releases trapped air bubbles
- Vibrating the mold also helps (use sander without sandpaper)
Step 6: Let Cure
- Let sit 24-48 hours
- Cover with plastic to slow drying (reduces cracking)
Step 7: Demold
- Flex plastic molds to loosen concrete
- Remove inner mold first, then outer
- If stuck, cut plastic away carefully
Step 8: Finish
- Let cure additional 2-3 days
- Sand rough edges with coarse sandpaper
- Sand smooth with fine grit
- Drill drainage hole in bottom if desired
Step 9: Seal
- Apply concrete sealer per package directions
- This prevents staining and efflorescence (white powder)
- Let dry 24 hours
Step 10: Plant
- Fill with potting soil
- Plant succulents, cacti, or houseplants
- Add pebble mulch for finished look
Pro Tips
💡 Add pigment to concrete mix for colored planters
💡 Press leaves or lace into mold before pouring for texture
💡 Use silicone molds for intricate shapes: Silicone Mold - $20
💡 Make matching coasters with leftover concrete
💡 Add feet by gluing cork pads - $6 to bottom
Project 28: Picture Frame Trays
Skill Level: Beginner | Time: 1-2 hours | Budget: $15-25 per tray

Transform thrifted picture frames into elegant serving trays. This quick project creates custom decor that's also functional.
Materials Needed
- Thick Wooden Frame - $5-15 (thrifted, 11x14" or larger)
- Cabinet Handles - $10/pair
- Spray Paint - $8
- Paint or Paper for Background - varies
- Glass Cleaner - $5
- Strong Adhesive - $8 (E6000 or construction adhesive)
- Felt Pads - $5
Step-by-Step Instructions
Step 1: Select Your Frame
Look for:
- Thick, sturdy frame (1"+ depth)
- Size: 11x14" minimum for functional tray
- Flat front surface for handle attachment
- Remove backing and glass, set aside
Step 2: Prep and Paint
- Clean frame thoroughly
- Lightly sand glossy surfaces
- Spray paint in your chosen color
- Metallic gold, brass, or matte black work well
- Apply 2-3 light coats
Step 3: Customize the Background
Options:
- Mirror: Keep original glass, spray back with mirror paint - $12
- Art: Insert decorative paper, fabric, or art print
- Chalkboard: Paint backing with chalkboard paint - $10
- Cork: Insert cork sheet - $8 for drink tray
Step 4: Reassemble
- Place background material
- Add glass if desired (or leave open for textured backing)
- Secure backing into frame
Step 5: Attach Handles
- Measure and mark handle placement (equal distance from edges)
- Pre-drill small holes if frame is wood
- Apply strong adhesive to handle backs
- Position and press firmly
- Let adhesive cure 24 hours
Step 6: Add Protective Feet
- Attach felt pads to bottom corners
- This protects surfaces from scratches
Pro Tips
💡 Use oversized frames (16x20"+) for coffee table trays
💡 Add a mirror for glamorous vanity tray
💡 Cork backing makes perfect bar/drink tray
💡 Gift-ready: Fill with candles, soap, or treats
💡 Mix and match frame styles for eclectic set
Project 29: Wine Bottle Vases
Skill Level: Beginner | Time: 1-2 hours | Budget: $10-20

Empty wine bottles transform into elegant vases with a few simple techniques. This eco-friendly project turns would-be trash into beautiful decor.
Materials Needed
- Empty Glass Bottles - free (save your own or ask restaurants)
- Goo Gone - $8 (removes labels)
- Spray Paint - $8 (glass paint or regular)
- Painters Tape - $6
- Twine or Raffia - $5
- Bottle Cutter - $20 (optional, for cutting)
Step-by-Step Instructions
Method A: Painted Bottles
Step 1: Clean Bottles
- Soak bottles in hot, soapy water
- Remove labels (use Goo Gone for stubborn adhesive)
- Clean inside with bottle brush
- Let dry completely
Step 2: Mask (Optional)
- For dipped look: tape off bottom third
- For stripes: wrap tape around bottle
- For geometric: apply tape in patterns
Step 3: Paint
- Spray light, even coats
- Glass-specific spray paint - $10 gives best adhesion
- Or use regular spray paint and seal with clear coat
- Apply 2-3 coats
- Remove tape while paint is slightly wet
Step 4: Add Texture
- Wrap painted neck with twine or raffia
- Secure with hot glue
- Or add metallic leaf - $12 for accents
Method B: Cut Bottles (Advanced)
Step 1: Score
- Use bottle cutter to create score line around bottle
- Rotate bottle firmly against cutter
Step 2: Heat and Cool
- Pour boiling water over score line, rotating bottle
- Immediately plunge into ice water
- Repeat 2-3 times
- Bottle should separate along score line
Step 3: Sand Edge
- Sand cut edge with wet/dry sandpaper
- Start with coarse (80-grit), finish with fine (400-grit)
- Edge should be smooth to touch
Pro Tips
💡 Save bottles from events (weddings, parties) for sentimental value
💡 Group odd numbers (3, 5, 7) for display
💡 Add fairy lights inside for magical effect: Fairy Lights - $12
💡 Use as oil/vinegar dispensers with pour spouts - $8
💡 Fill with colored water or beads for added interest
Project 30: Geometric Bookends
Skill Level: Intermediate | Time: 3-4 hours | Budget: $25-40

Heavy-duty bookends keep your shelves organized while adding sculptural art. These geometric concrete or wood bookends combine function with modern design.
Materials Needed
Concrete Version:
- Concrete Mix - $8
- Geometric Molds - $15 (silicone molds, triangles or prisms)
- Acrylic Paint - $10
- Paint Brushes - $12
- Felt Pads - $5
Wood Version:
- Wood Blocks - $20 (4x4" or 6x6", 6" long)
- Miter Saw - $25 (or have cut at store)
- Sandpaper - $8
- Wood Stain - $12
- Felt - $5 (for bottom)
- Wood Glue - $8
Step-by-Step Instructions (Concrete)
Step 1: Mix and Pour
- Mix concrete per package directions
- Pour into geometric molds
- Tap to release air bubbles
- Let cure 48 hours
Step 2: Demold
- Carefully remove from molds
- Sand rough edges
- Let cure additional 3 days
Step 3: Paint Design
- Paint geometric patterns: color block, dip-dye, or metallic accents
- Or leave natural concrete for industrial look
- Seal with concrete sealer
Step 4: Add Felt
- Cut felt to fit bottom
- Glue in place to protect shelves
Step-by-Step Instructions (Wood)
Step 1: Cut Angles
- Cut one end of wood block at 45-degree angle
- This creates the "L" shape that holds books
- Or create triangular prism by cutting two angles
Step 2: Create Base
- Cut 6" piece of same wood for base
- Glue angled piece to base at 90 degrees
- Clamp and let glue dry 2 hours
- Reinforce with screws from underside if desired
Step 3: Sand
- Sand all surfaces smooth
- Round edges slightly
Step 4: Finish
- Apply wood stain or paint
- Let dry, apply second coat if needed
- Seal with polyurethane
Step 5: Add Felt
- Glue felt to bottom
Pro Tips
💡 Make matching set - consistency looks professional
💡 Use contrasting colors - painted concrete or two-tone wood
💡 Weight matters - heavier bookends hold more books
💡 Add brass accents with nailhead trim for elegance
💡 Scale to shelf - 6-8" tall for standard books
Skill Level Guide: From Beginner to Advanced
Understanding skill levels helps you choose projects that match your experience and build confidence as you progress.
Beginner Projects
Characteristics:
- Require basic hand tools only
- No sewing or power tools required
- Mistakes are easily fixable
- Projects complete in 1-4 hours
Skills You'll Learn:
- Basic painting and finishing
- Using a hot glue gun
- Simple measuring and cutting
- Following step-by-step instructions
Beginner Projects in This Guide:
- Project 1: Macrame Wall Hanging
- Project 2: Pressed Flower Frames
- Project 3: Abstract Canvas Art
- Project 6: Gallery Wall Templates
- Project 11: Chalk Paint Dresser
- Project 13: Styled Bookshelf
- Project 16: Storage Ottoman
- Project 17: Bar Cart Transformation
- Project 19: No-Sew Curtains
- Project 20: Hand-Dyed Pillows
- Project 25: Terrarium
- Project 26: Soy Candle Making
- Project 28: Picture Frame Trays
- Project 29: Wine Bottle Vases
Intermediate Projects
Characteristics:
- Require some power tools (drill, staple gun)
- May involve basic sewing or upholstery
- Need precise measurements
- Projects take 4-8 hours
Skills You'll Learn:
- Using power tools safely
- Basic upholstery techniques
- Wood finishing and staining
- Pattern planning and layout
Intermediate Projects in This Guide:
- Project 4: Woven Wall Baskets
- Project 5: Floating Shelves
- Project 7: Painted Accent Wall
- Project 12: Vintage Chair Reupholstery
- Project 14: Tile Top Side Table
- Project 21: Woven Throw Blanket
- Project 22: Woven Table Runner
- Project 23: Floor Pouf
- Project 24: Rope Coil Basket
- Project 27: Concrete Planters
- Project 30: Geometric Bookends
Advanced Projects
Characteristics:
- Require multiple power tools
- Involve complex techniques (electrical, extensive upholstery)
- Require precision and planning
- Projects span multiple days
- Mistakes can be costly to fix
Skills You'll Learn:
- Electrical wiring (with safety precautions)
- Complex woodworking joinery
- Advanced finishing techniques
- Project planning and sequencing
Advanced Projects in This Guide:
- Project 8: DIY Wall Sconces (electrical)
- Project 15: DIY Upholstered Headboard (complex upholstery)
- Project 18: Storage Bench with Cubbies (woodworking)
Budget Estimates: From Thrifty to Investment
DIY home decor ranges from nearly free to significant investment. Here's how to budget for your projects:
Budget Categories
| Category | Cost Range | Best For |
|---|---|---|
| Thrifty | $0-25 | Small decor, upcycling, using existing materials |
| Budget | $25-75 | Wall decor, small textile projects, simple furniture updates |
| Mid-Range | $75-150 | Furniture makeovers, larger textile projects |
| Investment | $150-350 | Major furniture builds, advanced projects |
Money-Saving Strategies
1. Source Materials Creatively
- Facebook Marketplace free section
- Habitat ReStores for building supplies
- Dollar stores for basics
- Ask friends/family for unused supplies
2. Buy Tools Gradually
- Start with basics, add as needed
- Borrow specialty tools from friends
- Rent expensive tools (miter saw, tile cutter)
- Buy used tools: Craigslist, estate sales
3. Buy in Bulk
- Share supplies with crafting friends
- Buy paint in 5-gallon buckets for multiple projects
- Order fabric by the bolt for significant savings
4. Time Your Purchases
- Black Friday for tools
- January white sales for textiles
- End-of-season paint clearance
- Memorial Day/Labor Day furniture sales
Cost Per Project Summary
| Project | Skill Level | Cost Range |
|---|---|---|
| Macrame Wall Hanging | Beginner | $25-35 |
| Pressed Flower Frames | Beginner | $20-30 |
| Abstract Canvas Art | Beginner | $30-50 |
| Woven Wall Baskets | Intermediate | $40-60 |
| Floating Shelves | Intermediate | $50-80 |
| Gallery Wall | Beginner | $75-200 |
| Accent Wall | Intermediate | $100-200 |
| Wall Sconces | Advanced | $60-100 |
| Paper Flower Wall Art | Beginner | $15-25 |
| Framed Fabric Art | Beginner | $30-50 |
| Chalk Paint Dresser | Beginner | $75-120 |
| Chair Reupholstery | Intermediate | $80-150 |
| Bookshelf Styling | Beginner | $50-100 |
| Tile Top Table | Intermediate | $60-100 |
| Upholstered Headboard | Advanced | $150-250 |
| Storage Ottoman | Beginner | $40-70 |
| Bar Cart | Beginner | $80-150 |
| Storage Bench | Advanced | $200-350 |
| No-Sew Curtains | Beginner | $30-60 |
| Hand-Dyed Pillows | Beginner | $25-40 |
| Woven Throw Blanket | Intermediate | $60-100 |
| Table Runner | Intermediate | $40-60 |
| Floor Pouf | Intermediate | $50-80 |
| Rope Basket | Beginner | $25-35 |
| Terrarium | Beginner | $30-50 |
| Candle Making | Beginner | $40-60 |
| Concrete Planters | Intermediate | $30-50 |
| Frame Trays | Beginner | $15-25 |
| Bottle Vases | Beginner | $10-20 |
| Bookends | Intermediate | $25-40 |
Time Requirements: Planning Your Projects
Realistic time estimates help you plan your DIY calendar and avoid frustration. Here's what to expect:
Time Categories
| Category | Duration | Best For |
|---|---|---|
| Quick Win | 1-3 hours | Weekend afternoon, instant gratification |
| Weekend Project | 4-8 hours | Full Saturday or Sunday |
| Multi-Day | 8-20 hours | Spread across multiple weekends |
| Long-Term | 20+ hours | Dedicated hobby time over weeks |
Time-Saving Tips
1. Batch Similar Tasks
- Cut all fabric at once
- Paint multiple items together
- Dye several pieces simultaneously
2. Prep the Night Before
- Lay out all tools and materials
- Review instructions
- Create templates or patterns
3. Use the Right Tools
- A power sander vs. hand sanding: saves hours
- Fabric cutter vs. scissors: cleaner cuts, faster
- Spray gun vs. brush: smoother finish in less time
4. Account for Drying/Curing Time
Many projects are "hands-off" for 50% of the total time:
- Paint: 4-24 hours between coats
- Concrete: 48-72 hours to cure
- Glue: 2-24 hours to set
Realistic Scheduling
For a typical working person with 2-4 hours on weekends:
- Beginner projects: Complete in 1-2 sessions
- Intermediate projects: Complete in 2-4 sessions over 1-2 weekends
- Advanced projects: Complete in 4-8 sessions over 2-4 weekends
Frequently Asked Questions (FAQ)
General DIY Home Decor Questions
Q1: How much money can I really save with DIY home decor?
A: On average, DIY home decor costs 60-80% less than buying equivalent retail items. For example:
- Store-bought macrame wall hanging: $150-300 | DIY: $25-35 (save 75-90%)
- Custom upholstered headboard: $500-1500 | DIY: $150-250 (save 70-85%)
- Designer throw pillows: $40-80 each | DIY: $25-40 (save 40-70%)
Your savings increase with skill level—as you gain experience, you complete projects faster and with fewer mistakes.
Q2: What are the most essential tools for starting out?
A: Start with these 10 basics (total investment ~$150):
- Measuring tape
- Scissors set (fabric, paper, detail)
- Hot glue gun
- Hammer and screwdriver set
- Level
- Staple gun
- Drill
- Paint brushes (variety pack)
- Pliers
- Utility knife
Buy quality versions of frequently used tools (scissors, measuring tape). Budget versions work fine for occasional use.
Q3: How do I know if a thrift store piece is worth upcycling?
A: Look for these positive signs:
- Solid wood construction (heavy, visible grain)
- Dovetail joints in drawers (quality craftsmanship)
- Sturdy frame (no wobbling)
- Working hardware (drawers slide, doors close)
- Minimal damage (scratches are fine, breaks are not)
Avoid:
- Particle board or MDF (doesn't refinish well)
- Strong odors (smoke, pet smells are hard to remove)
- Structural damage (broken legs, warped tops)
- Missing essential parts
Q4: What should I do if I make a mistake on a project?
A: Most mistakes are fixable:
- Paint mistakes: Sand and repaint
- Uneven cuts: Trim or hide with trim/molding
- Glue mishaps: Remove excess with acetone (test first) or sand when dry
- Uneven stains: Apply dark wax or gel stain to even out
- Crooked hanging: Fill holes with spackle, repaint, try again
Remember: Handmade doesn't mean perfect—it means made with heart. Small imperfections add character.
Q5: How do I choose colors that work together in my home?
A: Use these foolproof strategies:
The 60-30-10 Rule:
- 60% dominant color (walls, large furniture)
- 30% secondary color (curtains, rugs, accent furniture)
- 10% accent color (pillows, art, accessories)
Color Schemes:
- Monochromatic: Various shades of one color
- Analogous: Colors next to each other on color wheel (blue, blue-green, green)
- Complementary: Opposite colors (blue/orange, purple/yellow)
Tools:
- Use a color palette from existing artwork or rug
- Try Adobe Color for digital palette creation
- Buy sample pots and paint 2x2' test areas
Project-Specific Questions
Q6: Can I use interior paint for furniture projects?
A: Yes, but with caveats:
- Wall paint: Works on furniture but may scratch easier; always seal with wax or polyurethane
- Chalk paint: Specifically designed for furniture, requires wax topcoat
- Milk paint: Creates authentic vintage look, may require bonding agent
- Acrylic paint: Good for small decor items, not durable enough for high-use furniture
For best results on furniture, use paint designed for furniture or cabinetry, and always apply a protective topcoat.
Q7: What's the difference between reupholstering and slipcovering?
A:
Reupholstering: Complete replacement of fabric and often padding. Requires removing old fabric, possibly rebuilding cushions, and attaching new fabric directly to frame. More permanent and polished result.
Slipcovering: Creating a removable fabric cover that fits over existing upholstery. Like a custom-fitted sheet. Easier to clean (machine washable), can be changed seasonally, but may shift with use.
Choose reupholstering for: permanent change, better fit, worn-out padding
Choose slipcovering for: flexibility, washability, reversible changes
Q8: How do I hang heavy items securely?
A: Follow these weight guidelines:
Under 10 lbs:
- Picture hanging strips (Command strips, etc.)
- Small nails or picture hooks
10-25 lbs:
- Wall anchors in drywall
- Picture hooks rated for weight
- Monkey hooks
25-50 lbs:
- Toggle bolts in drywall
- Directly into studs (use stud finder)
- French cleat system
Over 50 lbs:
- MUST attach to wall studs
- Use heavy-duty brackets or French cleat
- Consider professional installation
Always use a stud finder for heavy items, and when in doubt, use a bigger anchor than you think you need.
Q9: How do I keep my DIY projects looking good long-term?
A: Maintenance by project type:
Painted Furniture:
- Use coasters and trivets
- Clean with mild soap and water only
- Touch up scratches with matching paint
- Re-wax annually if using chalk paint
Upholstered Pieces:
- Vacuum regularly with upholstery attachment
- Rotate cushions monthly for even wear
- Spot clean spills immediately
- Professionally clean every 2-3 years
Textiles (Curtains, Pillows):
- Wash according to fabric care instructions
- Rotate pillow positions
- Keep out of direct sunlight to prevent fading
Wall Decor:
- Dust regularly
- Check hanging hardware annually
- Keep away from humid areas (bathrooms) unless sealed
Q10: Where can I find inspiration for my DIY projects?
A: Top sources for DIY home decor inspiration:
Online:
- Pinterest: The ultimate visual search engine for DIY
- Instagram: Follow hashtags like #diyhomedecor, #upcycledfurniture
- YouTube: Tutorial channels like DIY Creators, Home Repair Tutor
- TikTok: Quick, trendy DIY ideas
Offline:
- Home decor magazines: Anthropologie catalogs, West Elm lookbooks
- Museums and galleries: For color and composition inspiration
- Nature: Color palettes from landscapes
- Travel: Different architectural styles and cultural crafts
Tip: Create a mood board (physical or digital) before starting. Collect images that speak to you, then identify common themes (colors, textures, styles).
Shopping and Materials Questions
Q11: Are expensive materials worth the cost?
A: It depends on the project:
Worth the Investment:
- High-use furniture: Quality fabric, durable paint
- Tools you'll use often: Buy the best you can afford
- Safety equipment: Never skimp here
- Items you touch daily: Hardware, handles, knobs
Where to Save:
- One-time use tools: Borrow or buy budget versions
- Practice materials: Use scrap for learning
- Trendy colors: Inexpensive paint for accent pieces
- Hidden elements: Internal bracing, backing materials
Q12: How do I calculate how much material I need?
A: General formulas:
Paint:
- 1 gallon covers ~350-400 sq ft with one coat
- Measure width x height of all surfaces
- Divide by coverage rate
- Add 20% for touch-ups and errors
Fabric:
- Width of fabric (typically 45" or 54")
- Pattern repeat (if applicable—add one repeat per piece)
- Direction of pattern (nap, one-way designs)
- Always round up and buy extra (fabric varies between dye lots)
Wood:
- Draw detailed cut list
- Account for blade width (kerf) in cuts
- Buy 10-15% extra for mistakes and defects
Q13: What's the best way to store leftover materials?
A: Organize by category:
Paint:
- Store in original cans, labeled with room/project
- Seal tightly, store upside down (creates airtight seal)
- Keep in temperature-controlled space (not garage if extreme temps)
Fabric:
- Roll rather than fold to prevent creases
- Store in clear bins by color or type
- Include swatch card with care instructions
Wood:
- Store flat to prevent warping
- Keep off concrete floors (draws moisture)
- Label with wood type and dimensions
Tools:
- Pegboard for frequently used tools
- Original cases for power tools
- Climate-controlled storage for electronics
Download Your Free DIY Home Decor E-Book
🎁 Get Our Complete DIY Home Decor Projects E-Book (100+ Pages)
Want step-by-step photo instructions, printable shopping lists, and bonus projects? Download our comprehensive e-book and get:
✅ Detailed step-by-step photo guides for all 30 projects
✅ Printable shopping lists organized by store section
✅ Bonus projects: 10 additional DIY ideas not in this post
✅ Video tutorials for complex techniques
✅ Material substitution guide when you can't find exact items
✅ Troubleshooting section for common problems
✅ Seasonal decor variations for holidays and seasons
Enter your email below to get instant access:
[📧 Email Address Input] [Download Free E-Book Button]
We respect your privacy. Unsubscribe anytime. By downloading, you agree to receive occasional DIY tips and inspiration from LifestyleSprout.com
Conclusion: Your DIY Home Decor Journey Starts Now
Thirty projects. Countless possibilities. One transformed home.
DIY home decor is more than a cost-saving strategy—it's a pathway to creating a space that truly reflects who you are. Every brushstroke, every knot, every careful measurement adds not just beauty to your home, but stories to your life.
The projects in this guide range from 30-minute crafts to weekend-long transformations. Whether you're a complete beginner nervous about your first macrame wall hanging or an experienced DIYer ready to tackle that built-in storage bench, there's something here for you.
Your Next Steps:
- Start Small: Choose one beginner project from this guide to build confidence
- Gather Your Tools: Invest in the essential toolkit outlined in Part 1
- Create a Project Space: Set up a dedicated area for your DIY work
- Join the Community: Share your projects on social media with #LifestyleSproutDIY
- Document Your Journey: Before-and-after photos are incredibly satisfying
Remember:
- Progress over perfection: Your first attempt won't be flawless, and that's okay
- Mistakes are lessons: Every error teaches you something for next time
- Your home, your rules: Design for your taste, not trends
- Enjoy the process: The making is as rewarding as the finished piece
There's never been a better time to embrace DIY home decor. With the wealth of online tutorials, affordable materials, and supportive communities, you have everything you need to create a home that's uniquely yours.
So pick a project, gather your supplies, and start creating. Your dream home is just a DIY away.
Related Articles You'll Love
- 10 Essential Tools Every Home DIYer Needs
- How to Shop Thrift Stores Like a Pro: The Complete Guide
- Color Theory for Home Decor: A Beginner's Guide
- Upcycling 101: Transforming Trash to Treasure
- The Best Online Fabric Stores for DIY Projects
Last Updated: March 2026 | Word Count: ~6,200 words
This post contains affiliate links. We may earn a small commission when you purchase through our links at no additional cost to you. Thank you for supporting LifestyleSprout.com!
About the Author:
The LifestyleSprout editorial team includes professional interior designers, experienced DIYers, and home decor enthusiasts who have collectively completed hundreds of home projects. We've made the mistakes so you don't have to.
Have questions? Drop a comment below or reach out on social media. We love seeing your DIY creations!
Pin This for Later!

Save this comprehensive guide to your Pinterest board for easy reference whenever you need DIY inspiration!
Tags: #DIYHomeDecor #HandmadeHome #DIYProjects #HomeDecorIdeas #BudgetDecor #Upcycling #DIYFurniture #HomeImprovement #CraftIdeas #InteriorDesign
Categories: Home Decor, DIY & Crafts, Budget Living, Interior Design